First Setup
Initial Setup in Vietnix Cloud
This guide will walk you through the first-time setup of your Vietnix Cloud account, including initial network configuration and an overview of the main dashboard components.
Vietnix Cloud Dashboard Overview
The Vietnix Cloud Dashboard provides a centralized interface to monitor and manage your cloud resources. On the main screen, you can view key metrics and the status of your services:
- CPU: Used / Available
- RAM: Used / Available
- Floating IPs: Used / Available
- Storage Space: Used
- VM Status: Current status of virtual machines on Vietnix Cloud
- Running: Active VMs
- In Progress: VMs being provisioned
- Stopped: VMs that are powered off
- Error: VMs with errors
- Top VMs: The VMs consuming the most resources in each category: vCPU, RAM, Storage

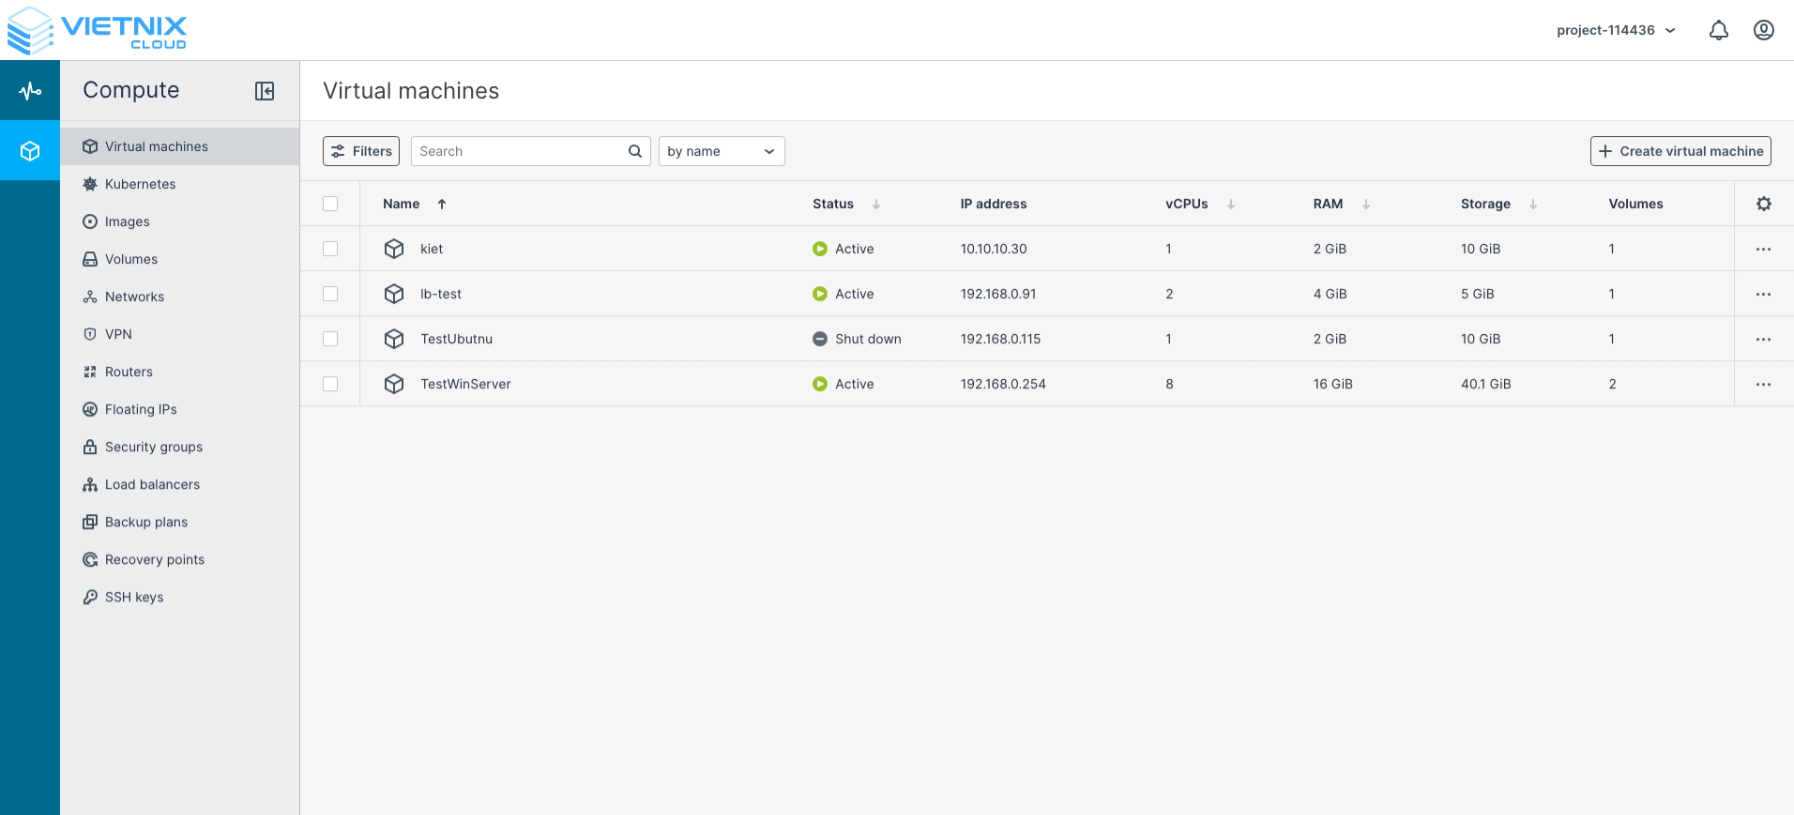
Compute Interface Overview
The Compute section is where you interact with your cloud resources. You can create, manage, and monitor virtual machines, networks, and storage.
Creating a Network
A network in the cloud allows your VMs and services to communicate securely. Here’s how to set up a virtual network:
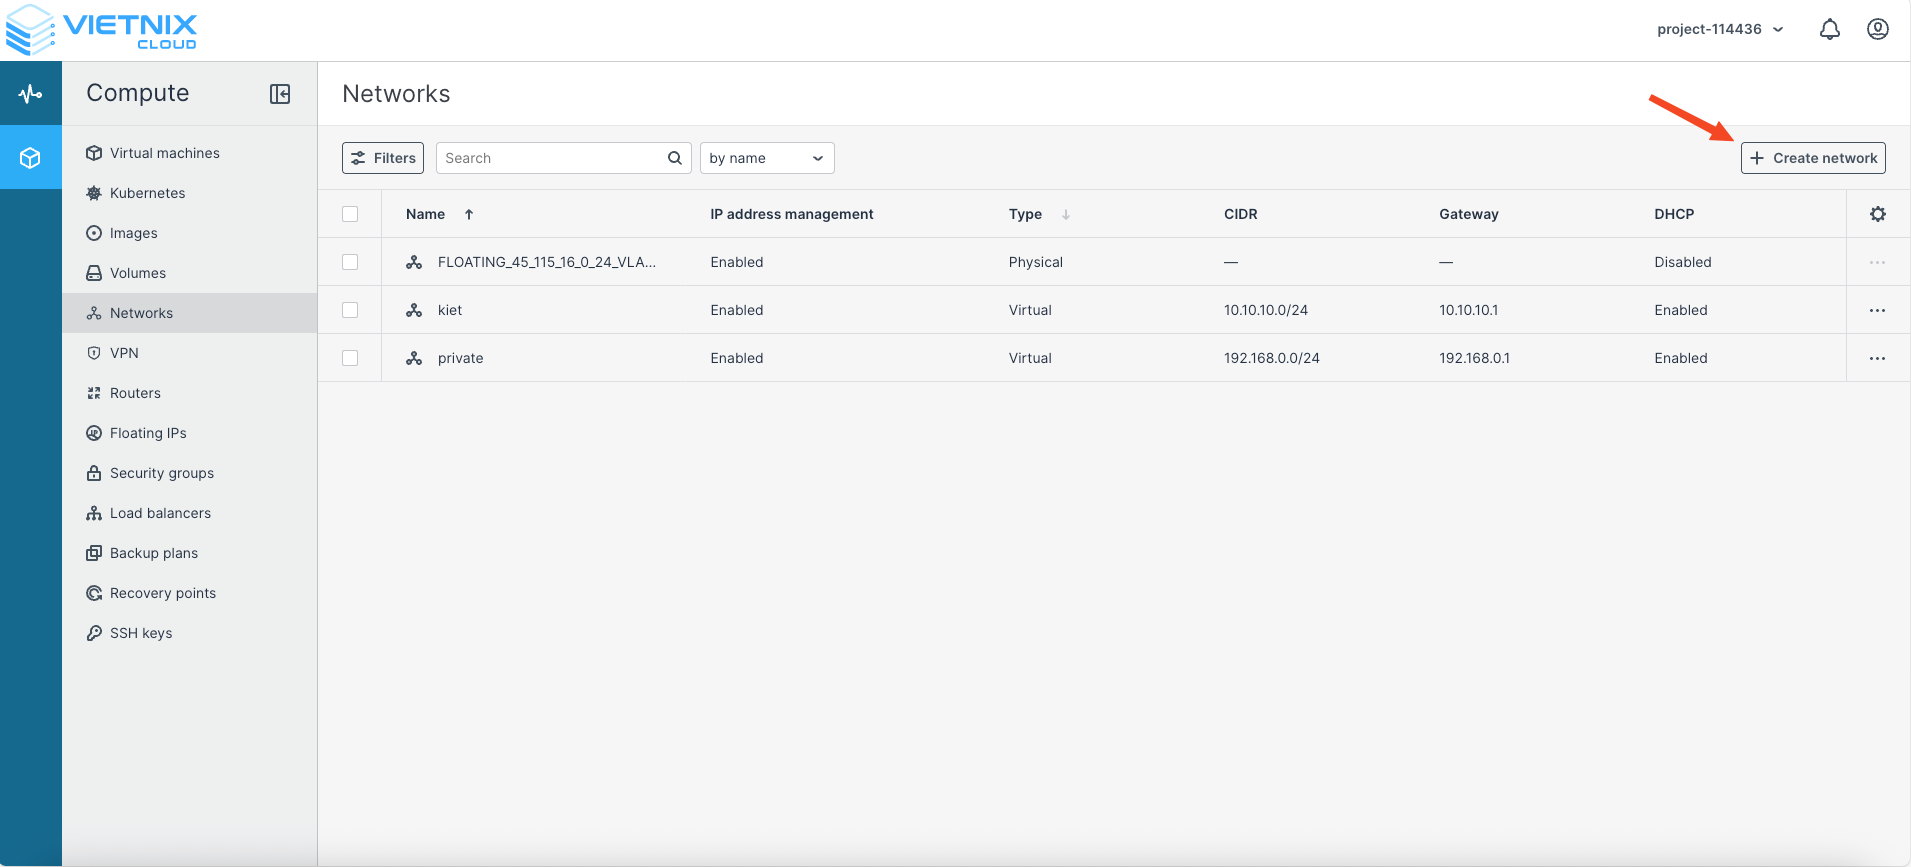
- Navigate to Compute → Networks.
- Click Create Network.
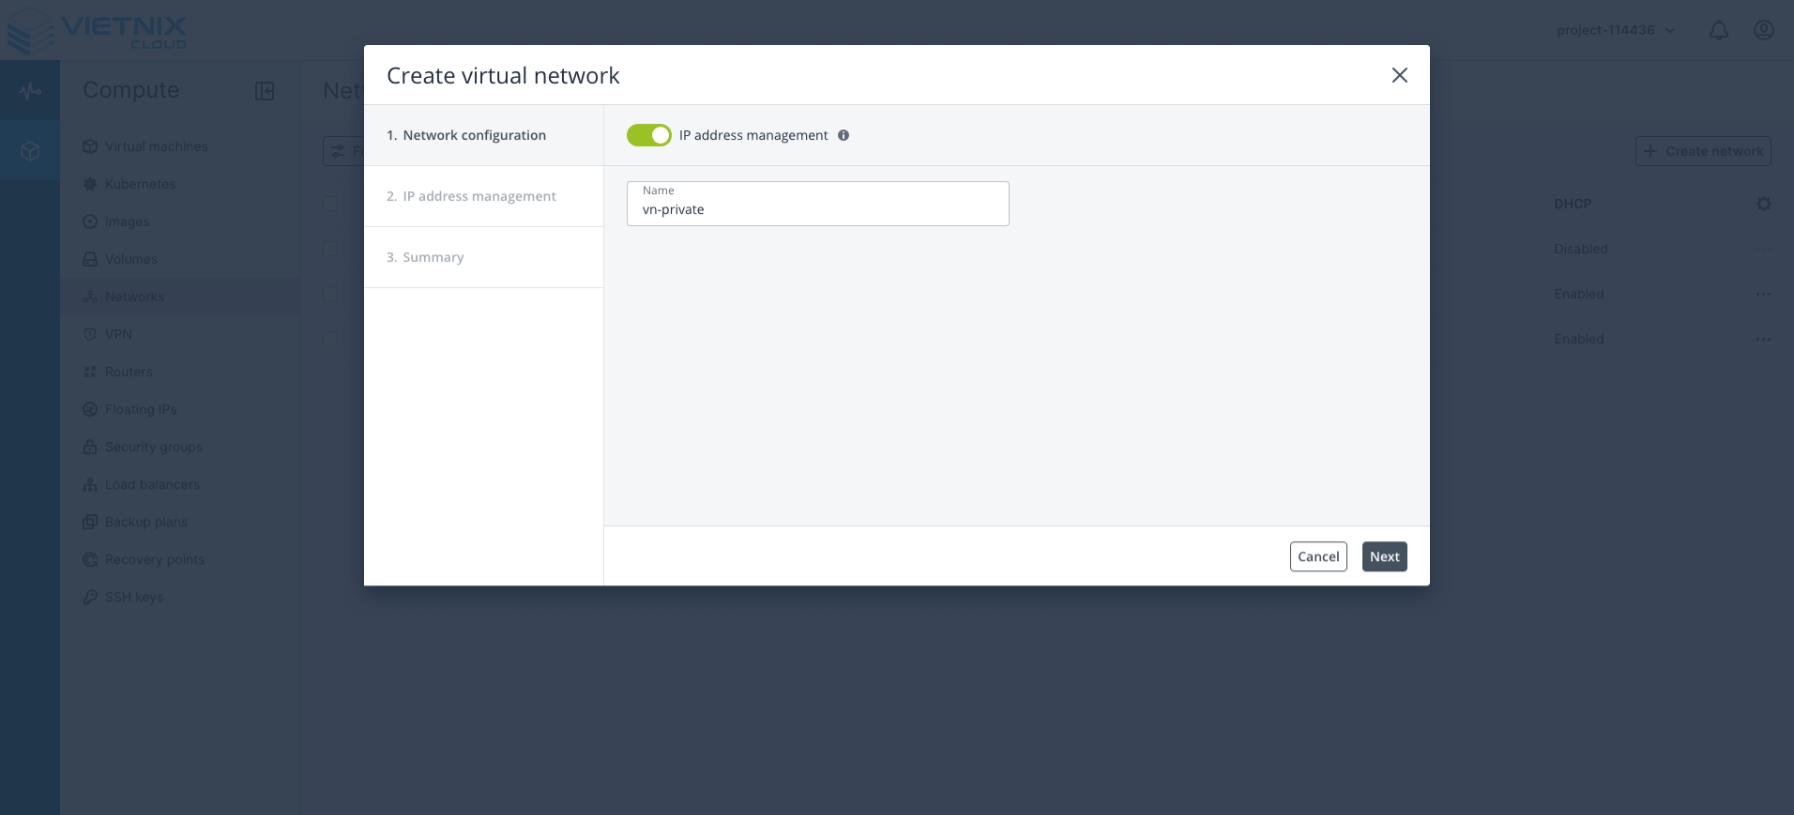
- In the Create Virtual Network screen:
- Name: Enter the desired name for your virtual network.
- Click Next.
- IP Address Management
- Subnets: Organize your network into subnets.
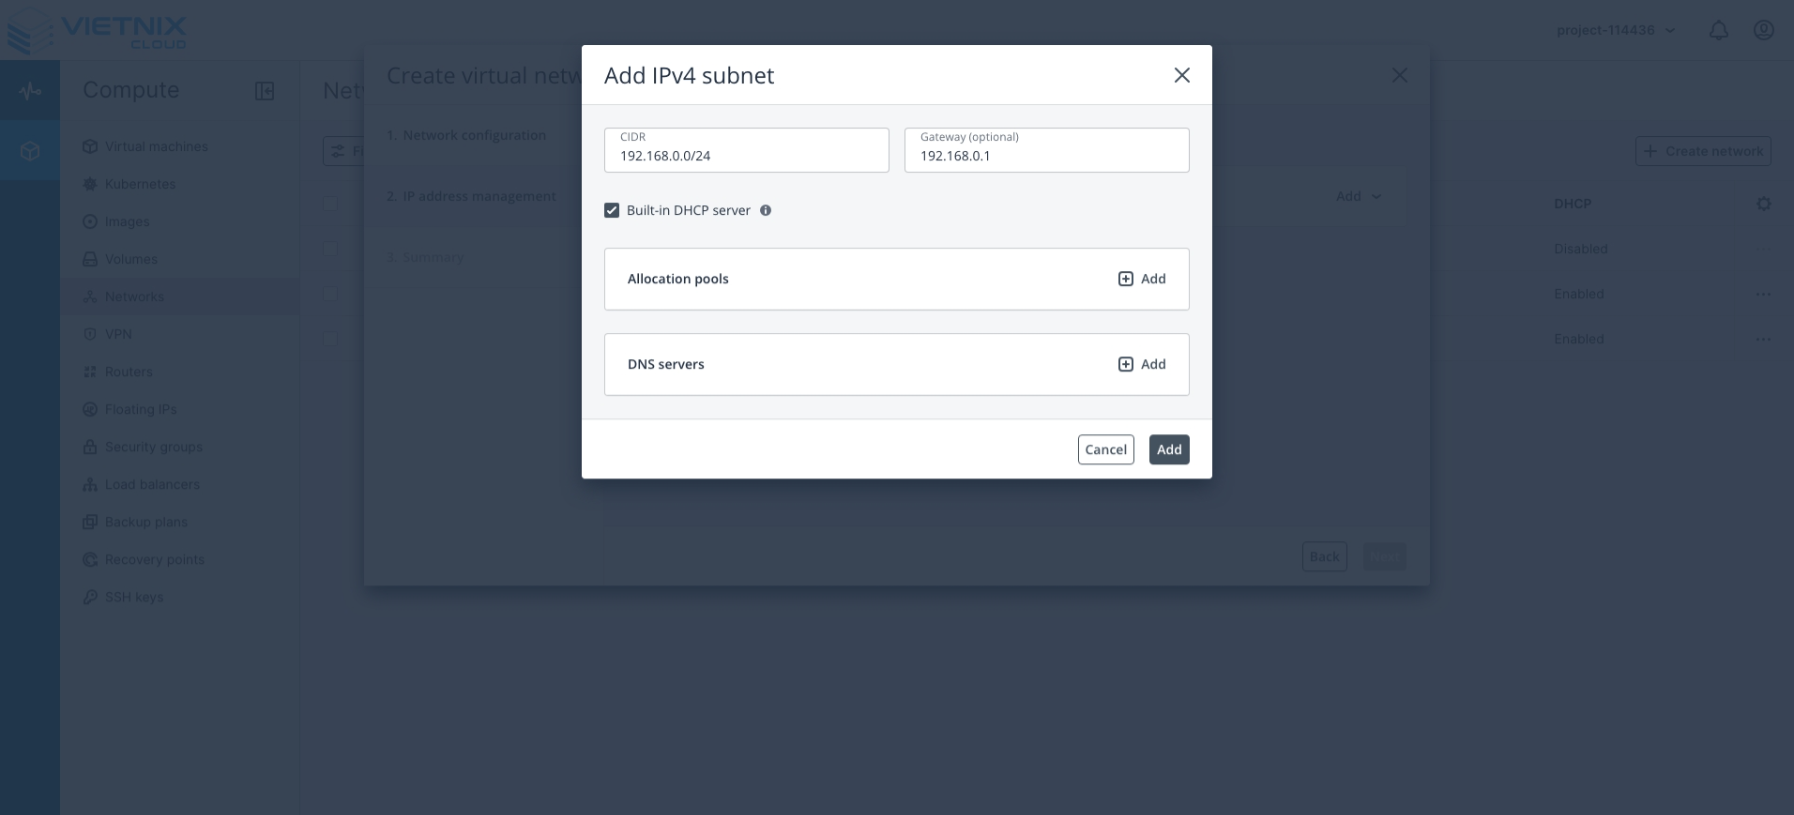
- Click Add → IPv4 Subnet.

- Add IPv4 Subnet
- CIDR: Enter the subnet range (e.g., 192.168.1.0/24).
- Gateway (optional): Specify a gateway if needed.
- Click Add.
Gateway is optional. But if you want your instances in this network to access the internet, you need to set a gateway. Then you can create a router and attach it to this network.
- Summary
- Review the network configuration.
- Click Create Virtual Network to finalize the setup.
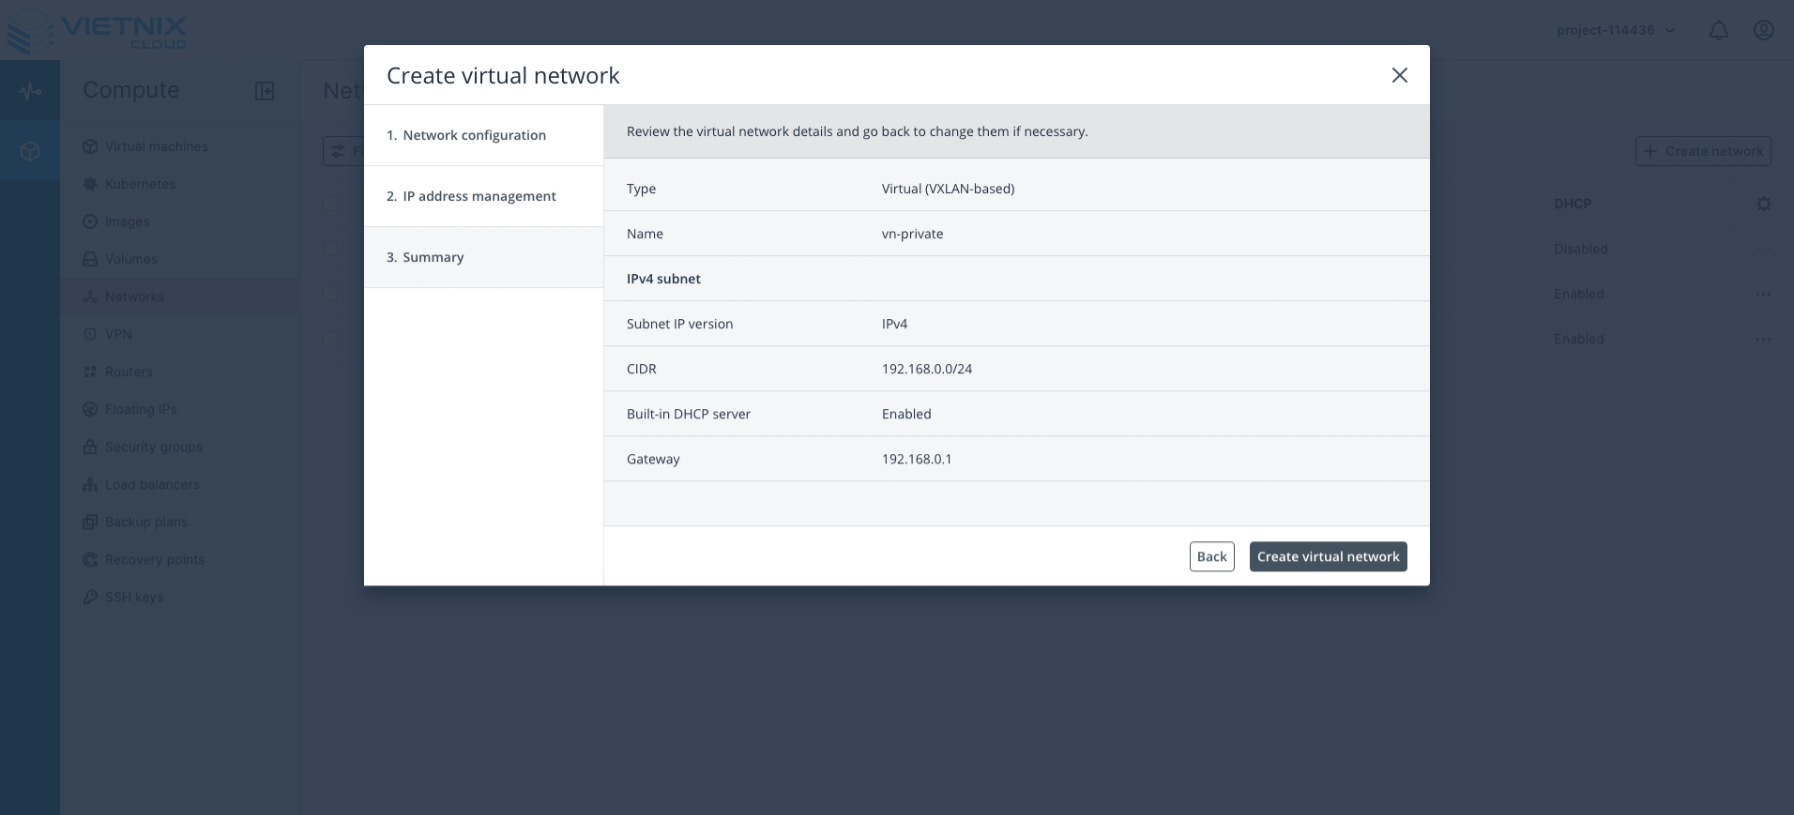
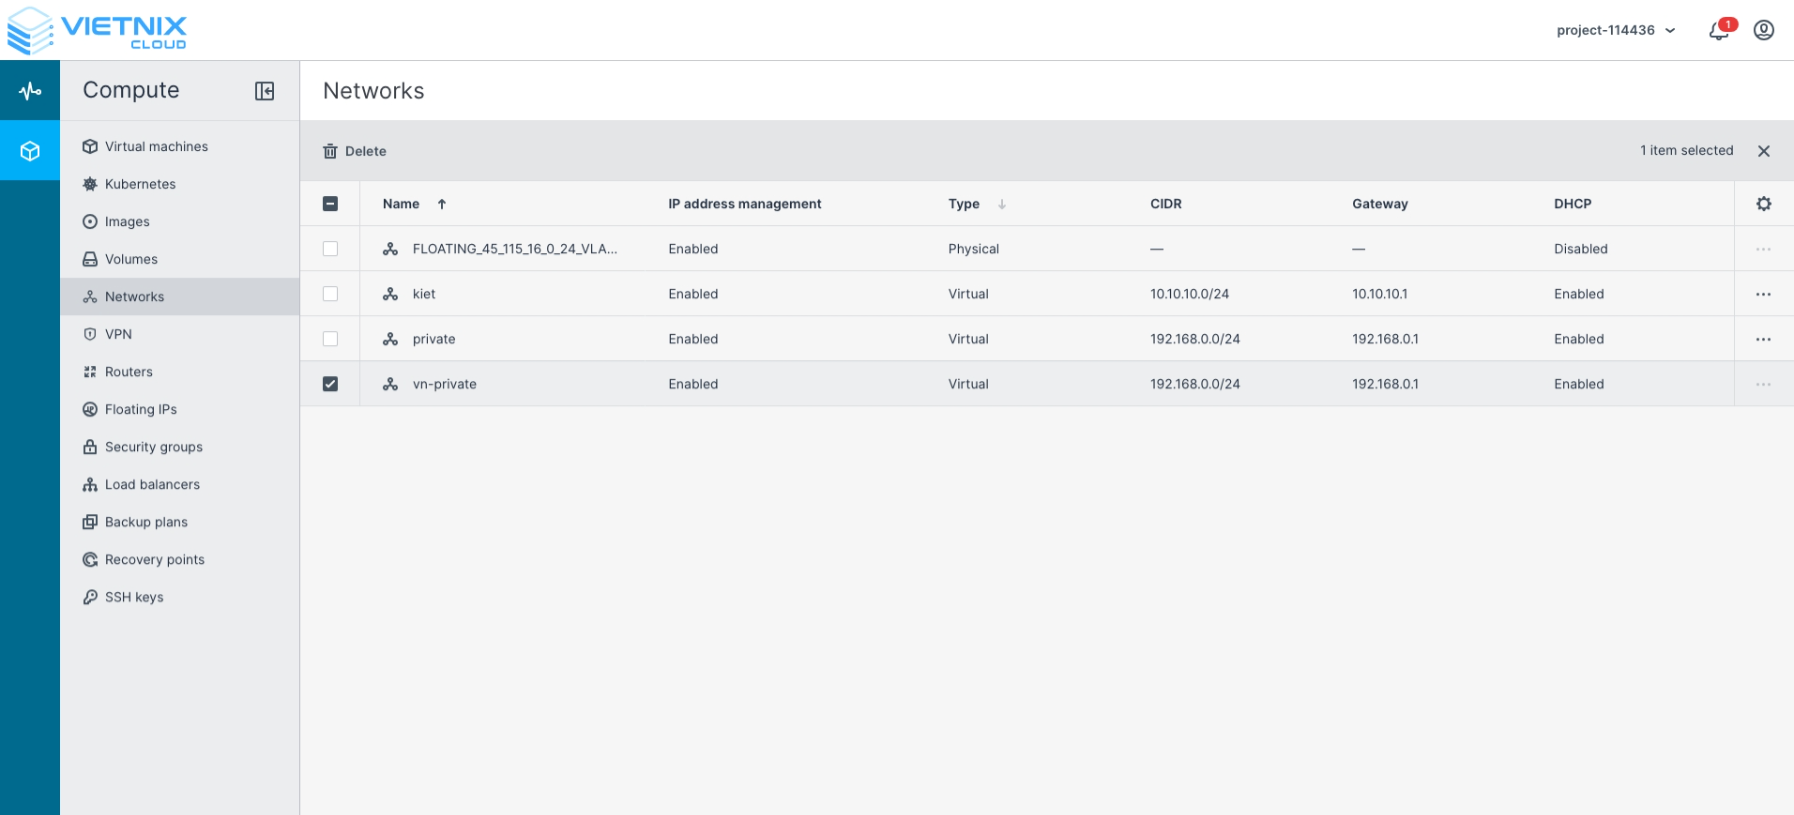
- Once successfully created, the network will appear in the Networks interface.
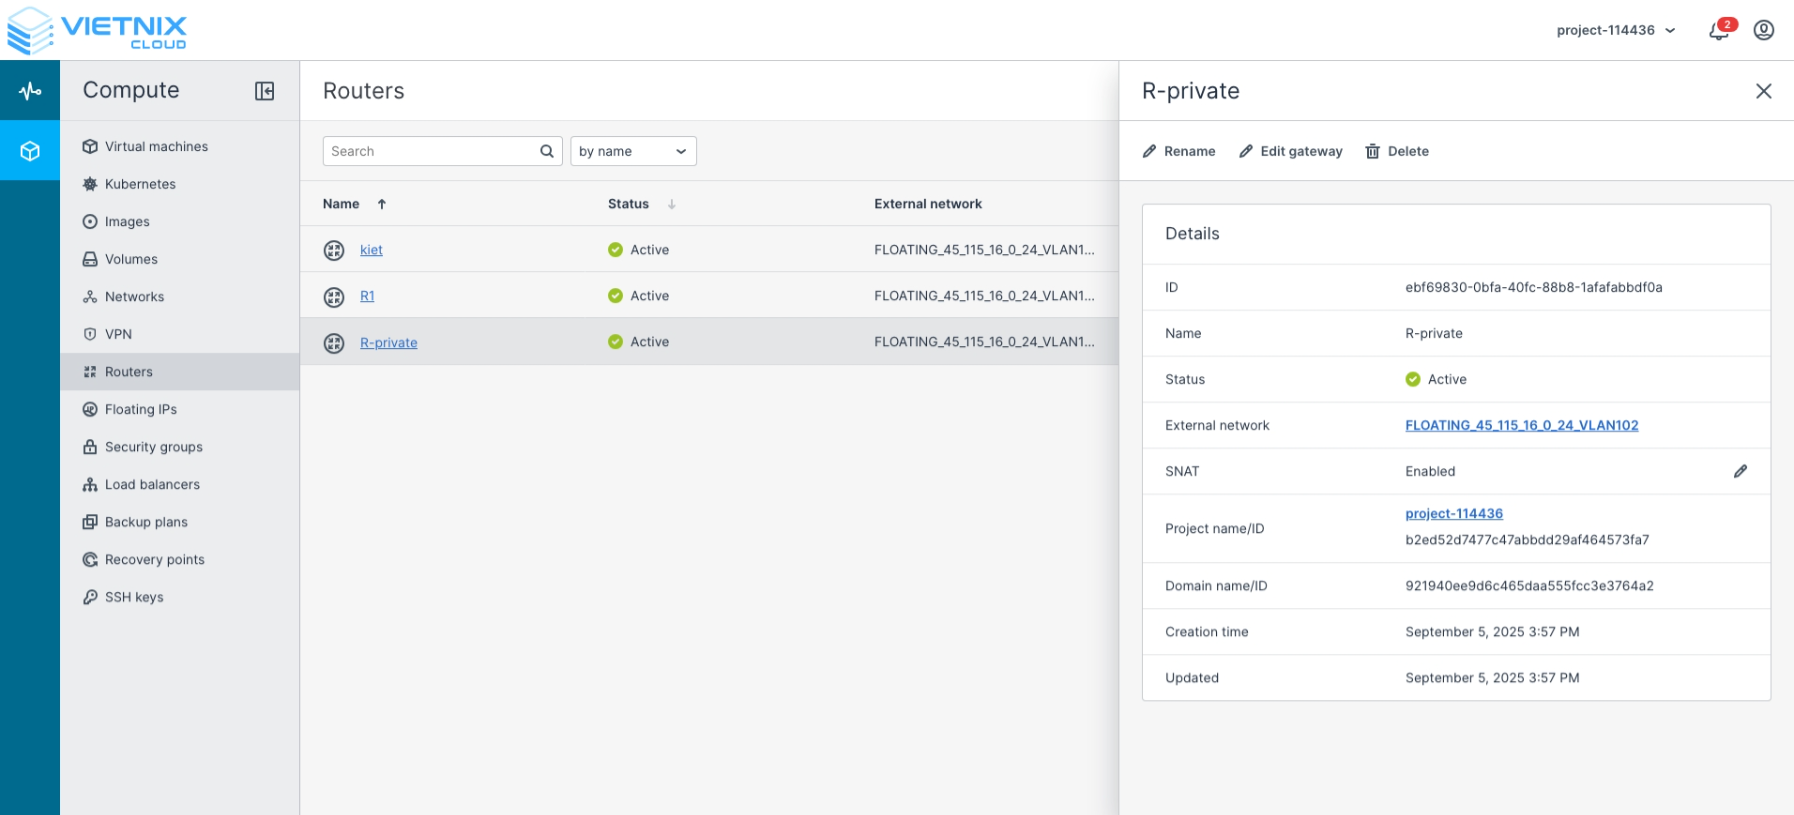
Creating a Router
A router in the cloud connects your virtual networks to each other and, if needed, to external networks. Adding a router ensures that your VMs can communicate across different subnets and access external resources securely. Here’s how to create a virtual router:
- Navigate to Compute → Routers.
- Click Add Router.
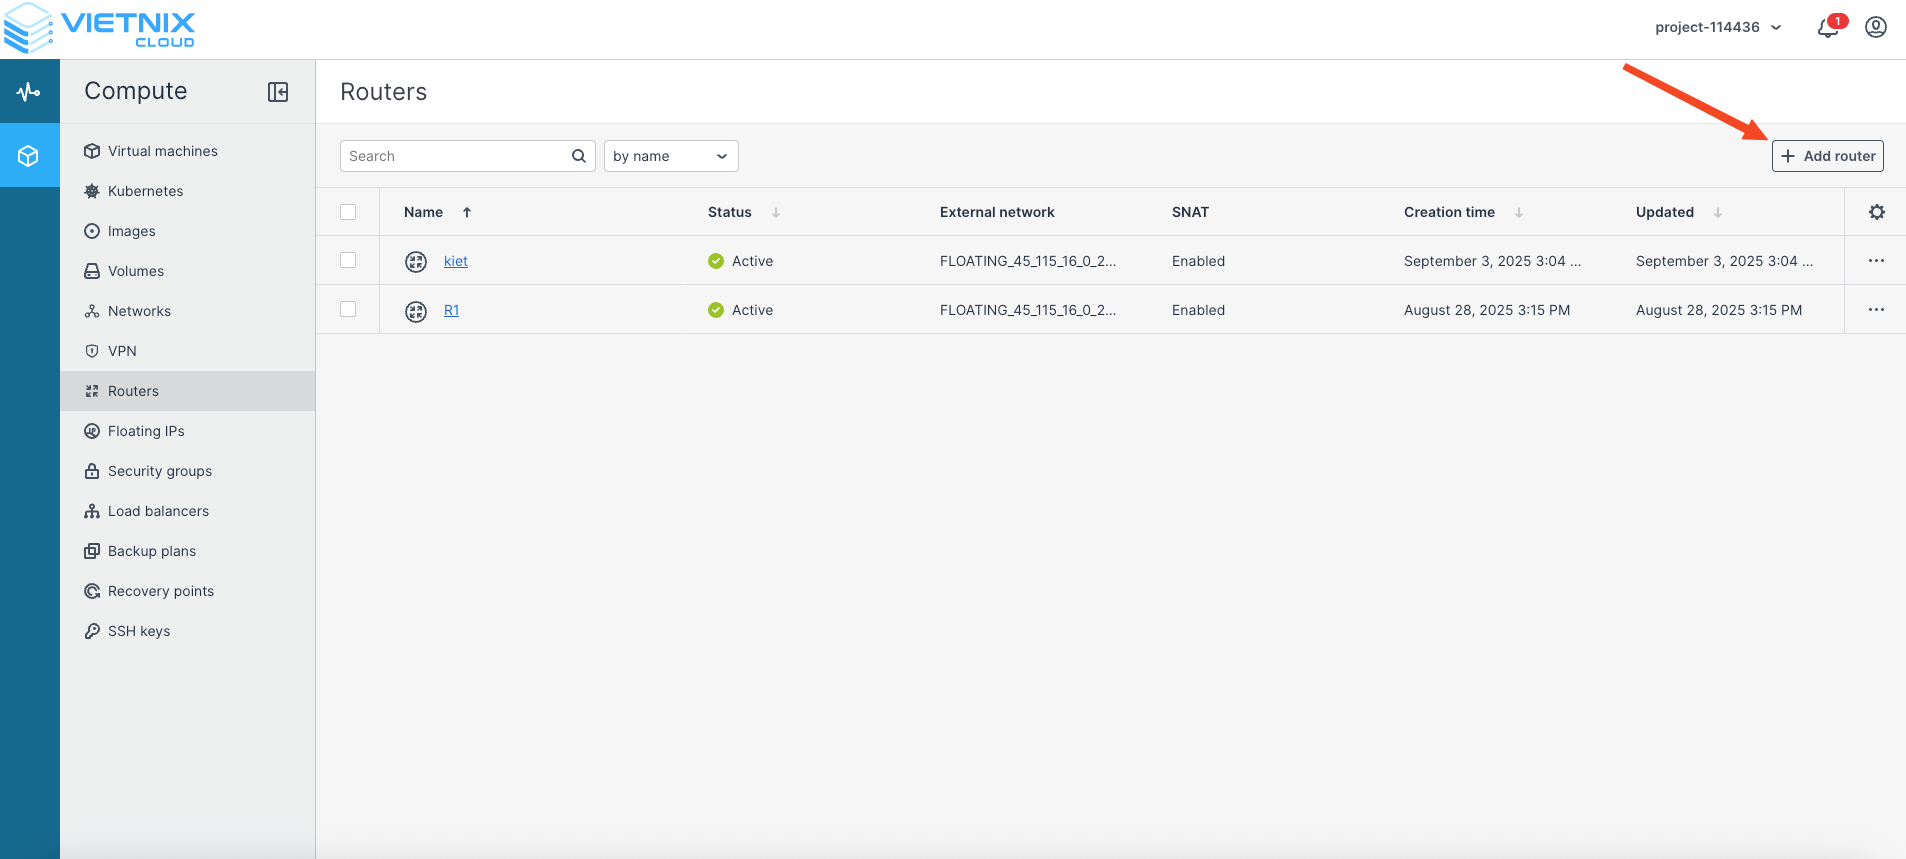
-
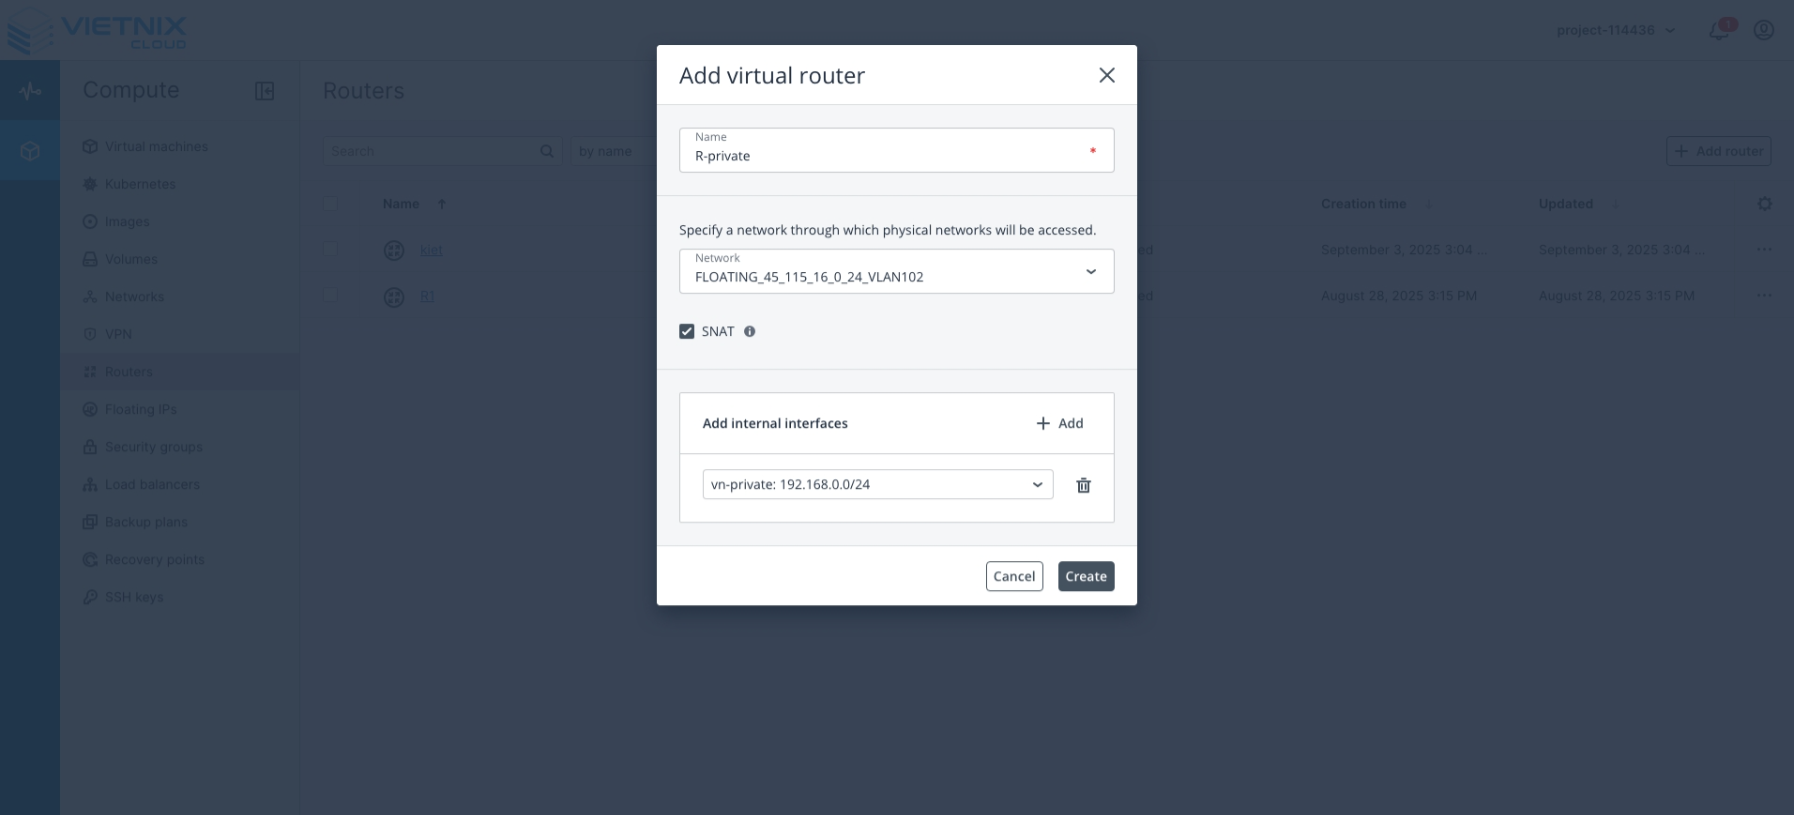
Configure the virtual router:
- Name: Enter a descriptive name for the router.
- Network: Specify the network that the router will manage, providing access between your virtual network and physical networks.
- Add Internal Interfaces: Select the network(s) you created earlier to attach to this router.
- Click Create.
You can save costs by using a single router to connect multiple networks instead of creating separate routers for each network.
- Confirm the router creation.
By completing these steps, you have successfully completed the initial setup in Vietnix Cloud, including creating networks and routers. Your virtual machines and networks are now ready to communicate efficiently. The next step will guide you through creating virtual machines and deploying a Kubernetes cluster on Vietnix Cloud.