Create Virtual Machine in Vietnix Cloud
After creating a virtual network, the next step is to create virtual machines and connect to them using SSH.
Pre-Creation Planning
Before creating virtual machines, make sure you have:
- An active Vietnix Cloud account
- A project with sufficient resources (CPU, RAM, and storage)
- A virtual network with available IP addresses
Preparing SSH Keys
SSH keys provide a secure way to access your virtual machines.
Linux / macOS
Run the following command in your terminal. Press Enter to accept the default settings:
ssh-keygen -t rsa -b 4096 -C "your_email@example.com"
The public key will be saved at:
~/.ssh/id_rsa.pub
Windows (PowerShell / Git Bash)
Run the same command in PowerShell or Git Bash. Press Enter to accept the default settings:
ssh-keygen -t rsa -b 4096 -C "your_email@example.com"
The public key will be saved at:
C:\Users\<YourUser>\.ssh\id_rsa.pub
TIP: The path to the key will be displayed during creation. Make note of it.
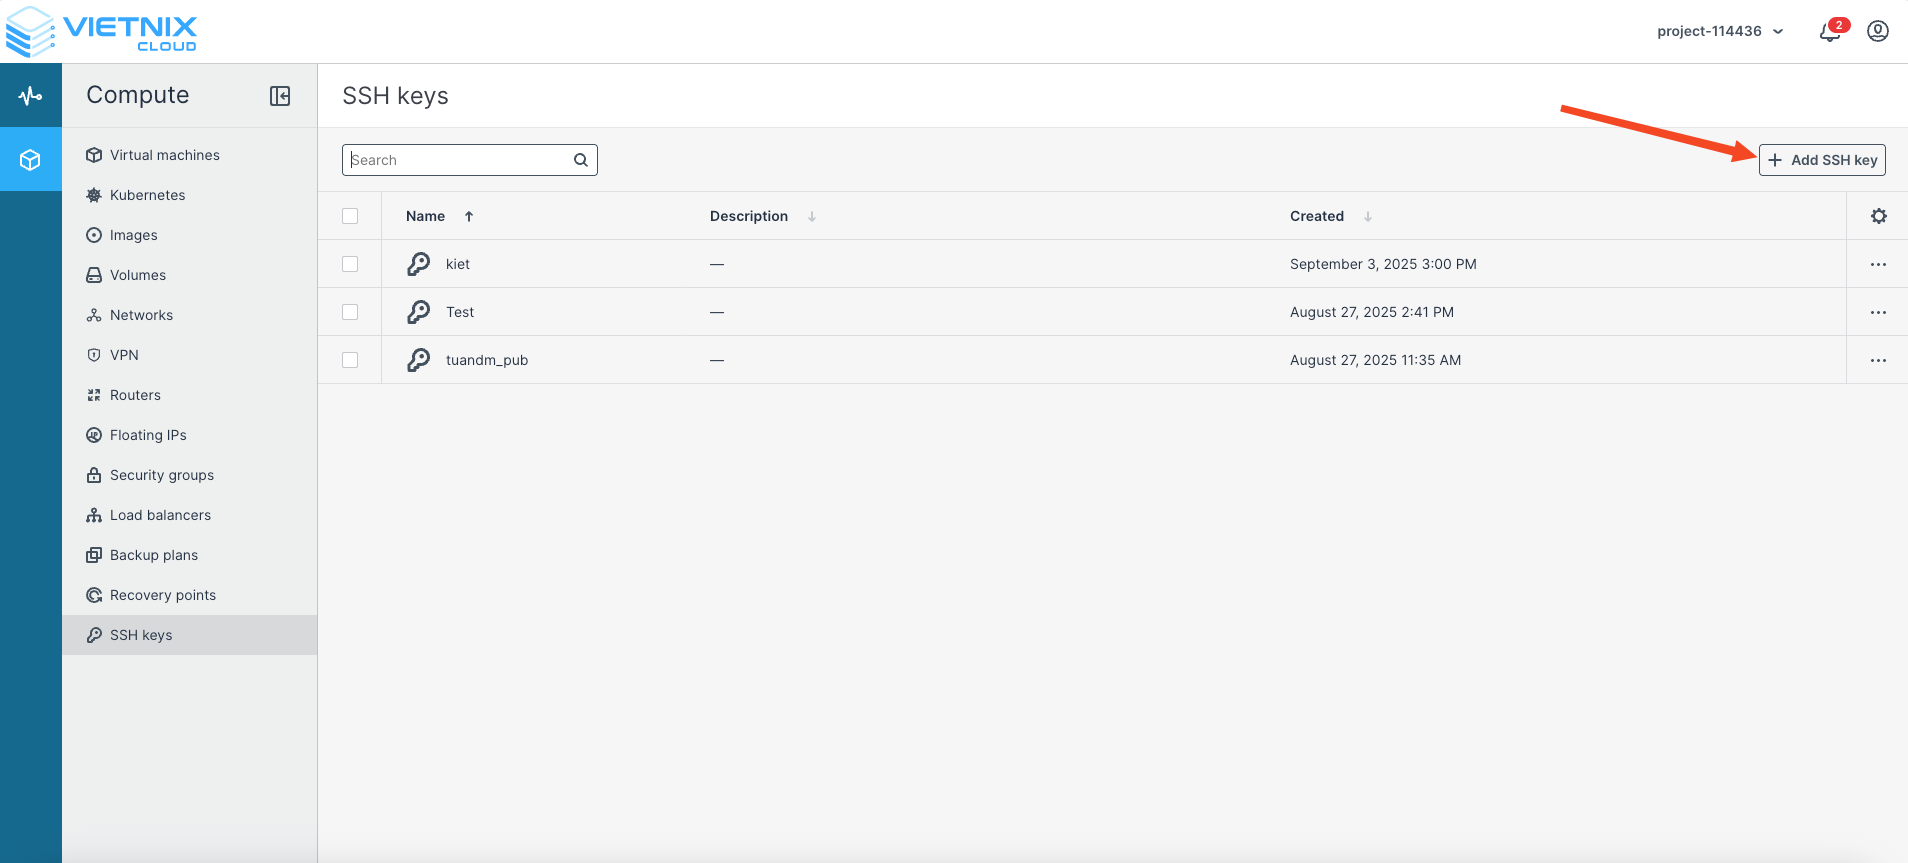
Add SSH Keys
-
Log in to the Vietnix Cloud Dashboard.
-
Navigate to Compute → SSH Key.
-
Click Add SSH Key.
-
Enter your public SSH key (usually the contents of
id_rsa.pub) and click Save.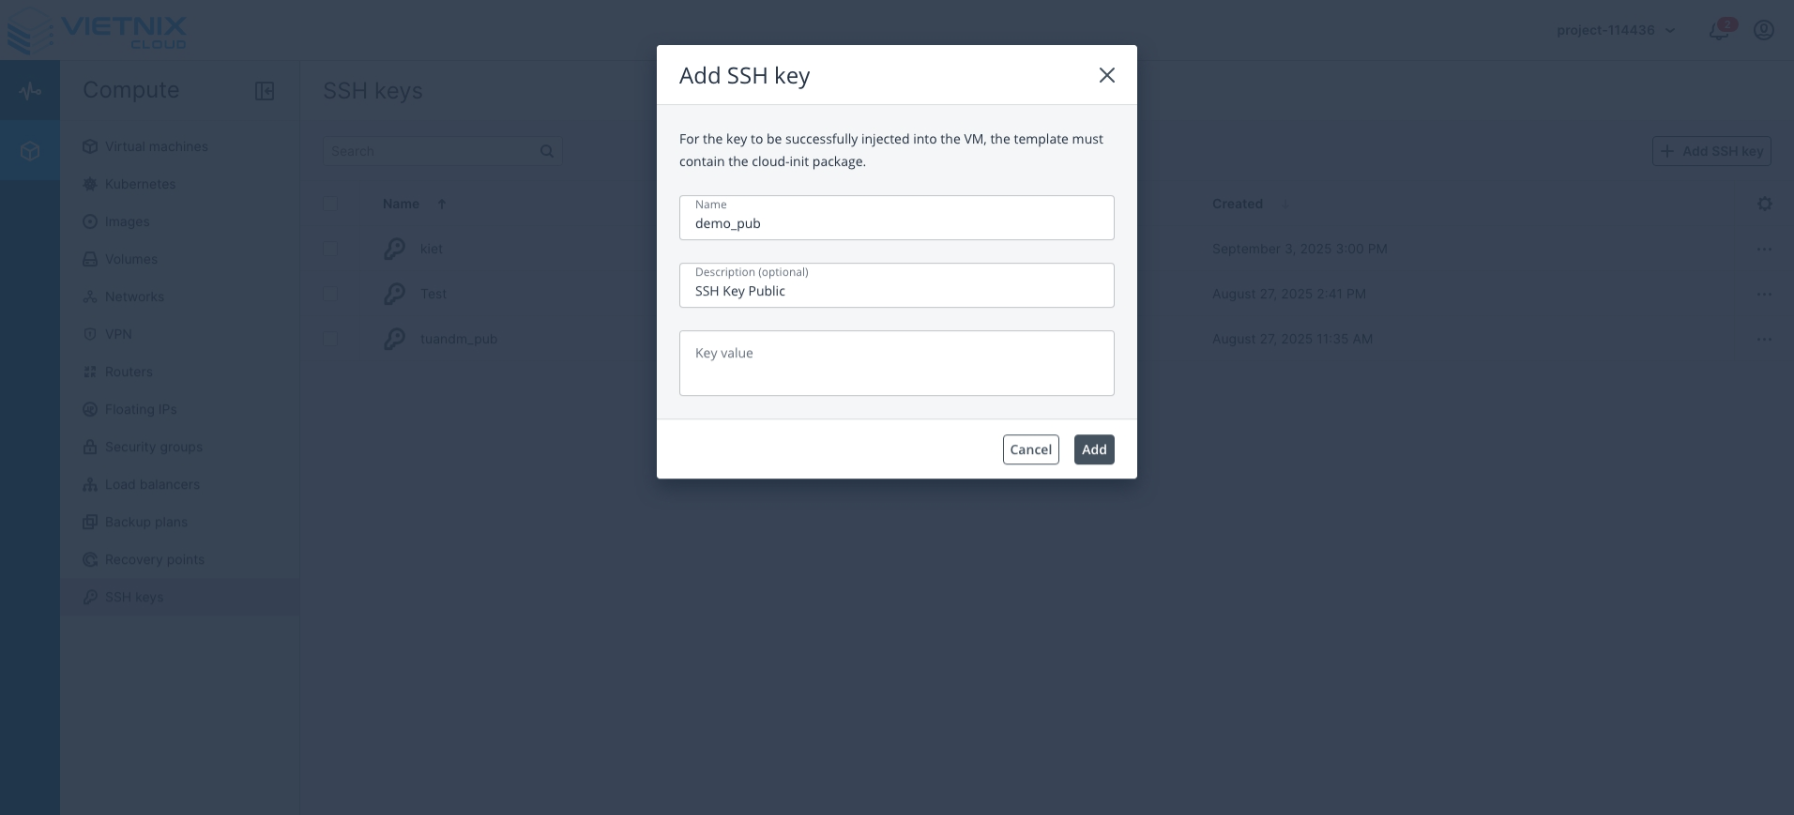
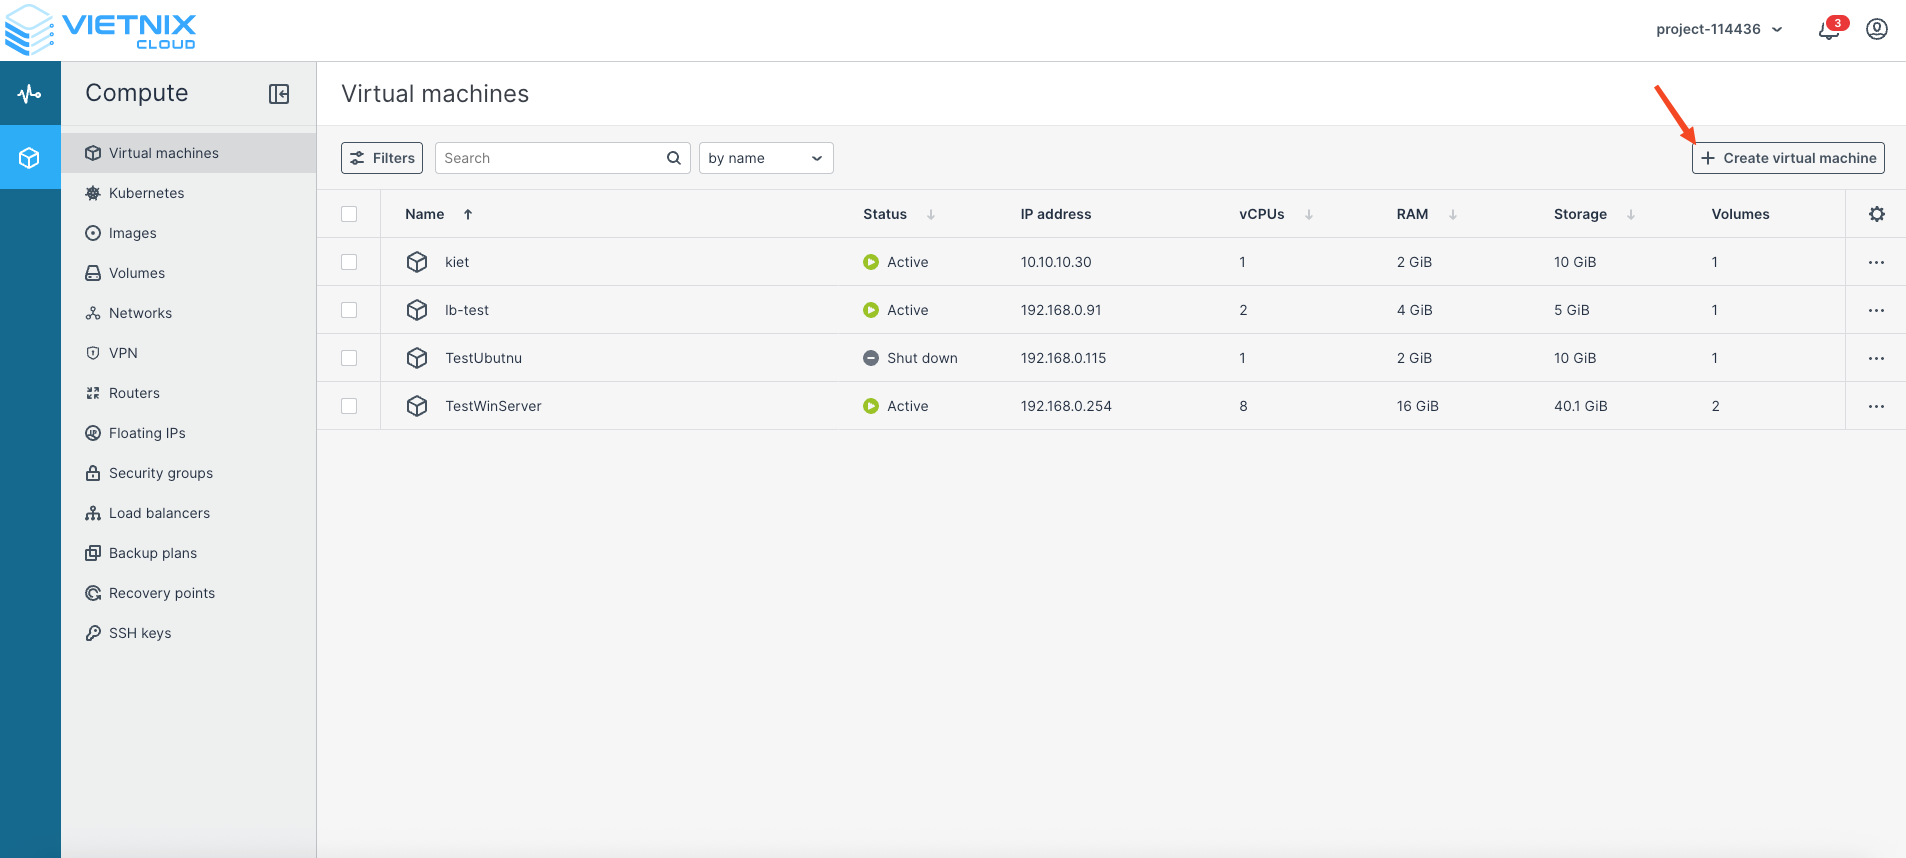
Create Virtual Machines
-
Navigate to Compute → Virtual Machines.
-
Click Create Virtual Machine.
-
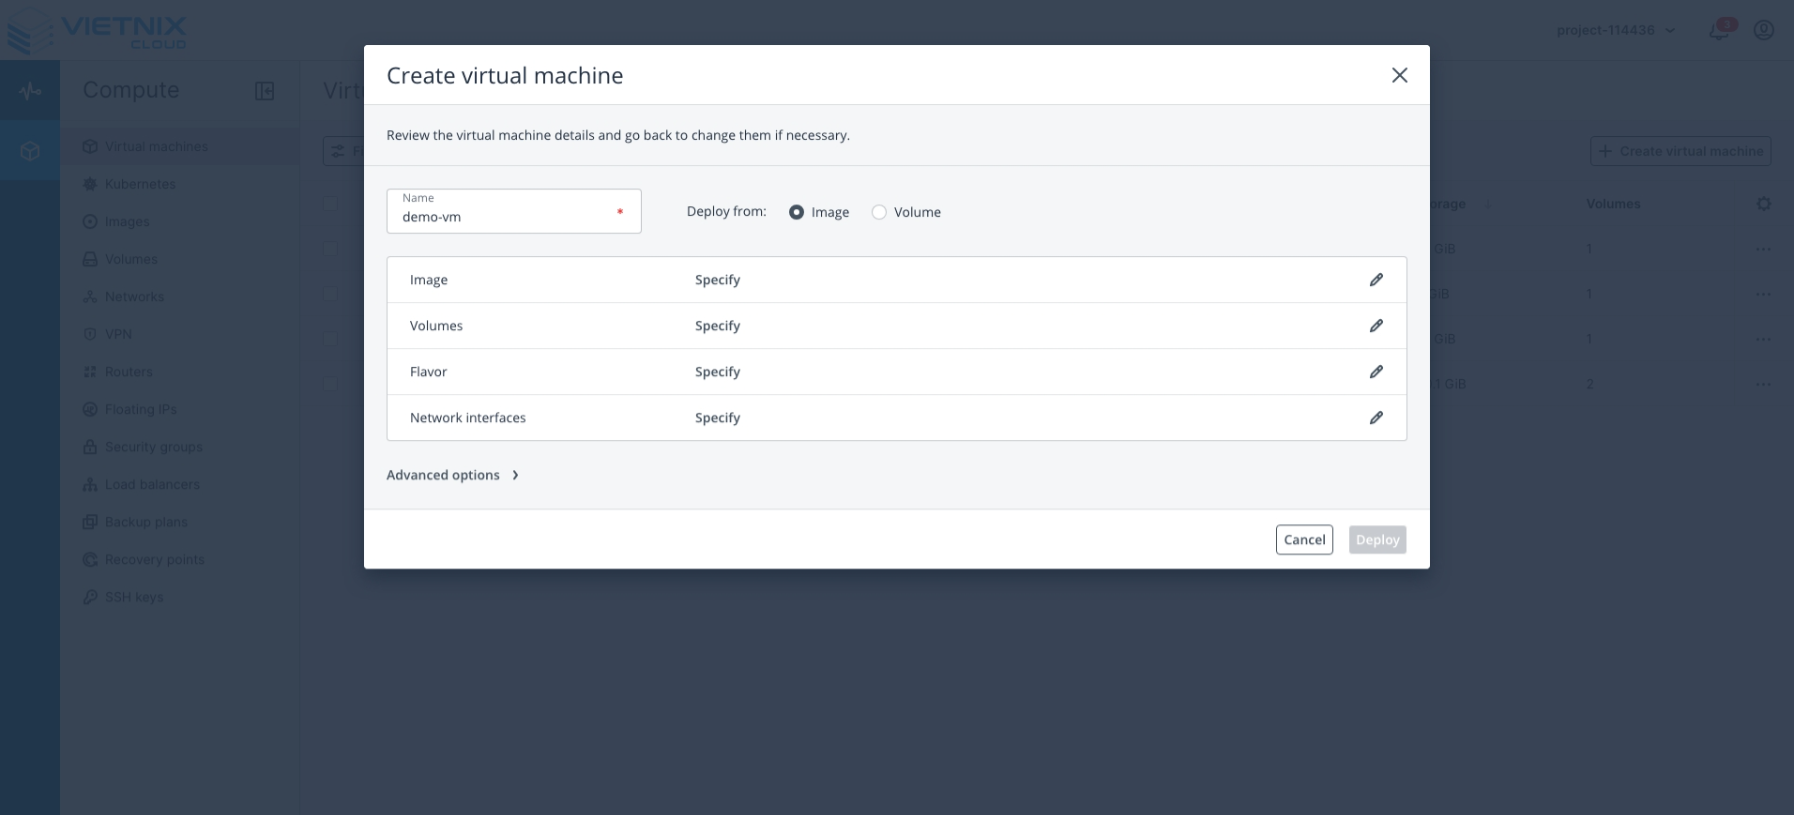
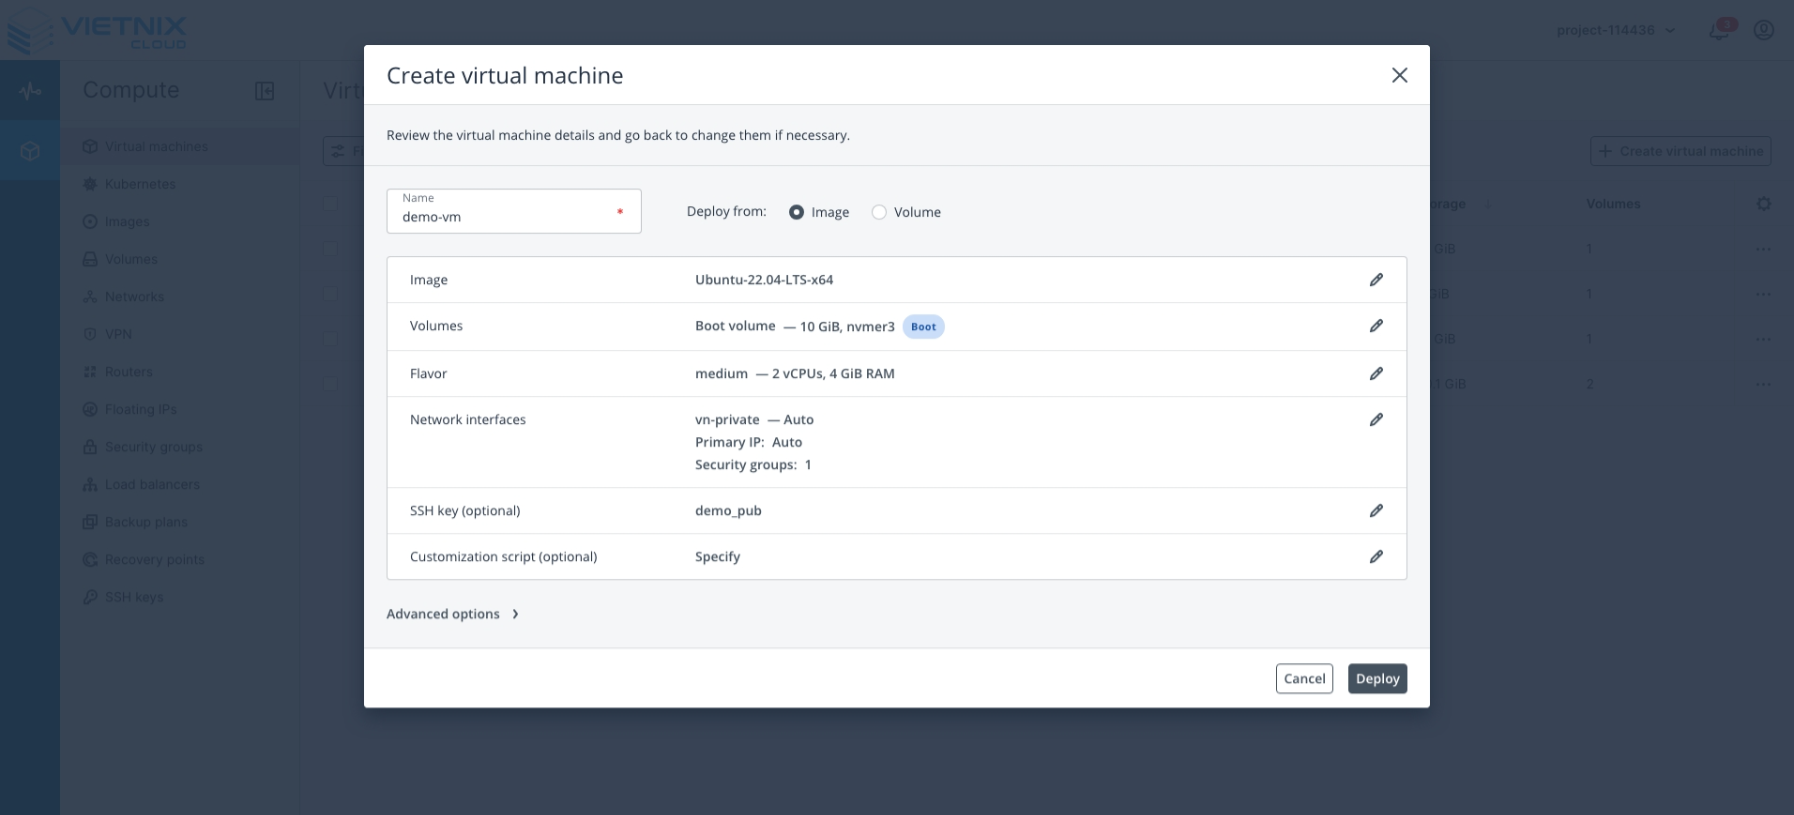
Configure your virtual machine:
-
Name: Enter a name for the virtual machine.
-
Deploy From: Select the deployment method (Image or Volume).
-
Image: Choose the image for the virtual machine (e.g.,
Ubuntu-22.04-LTS-x64).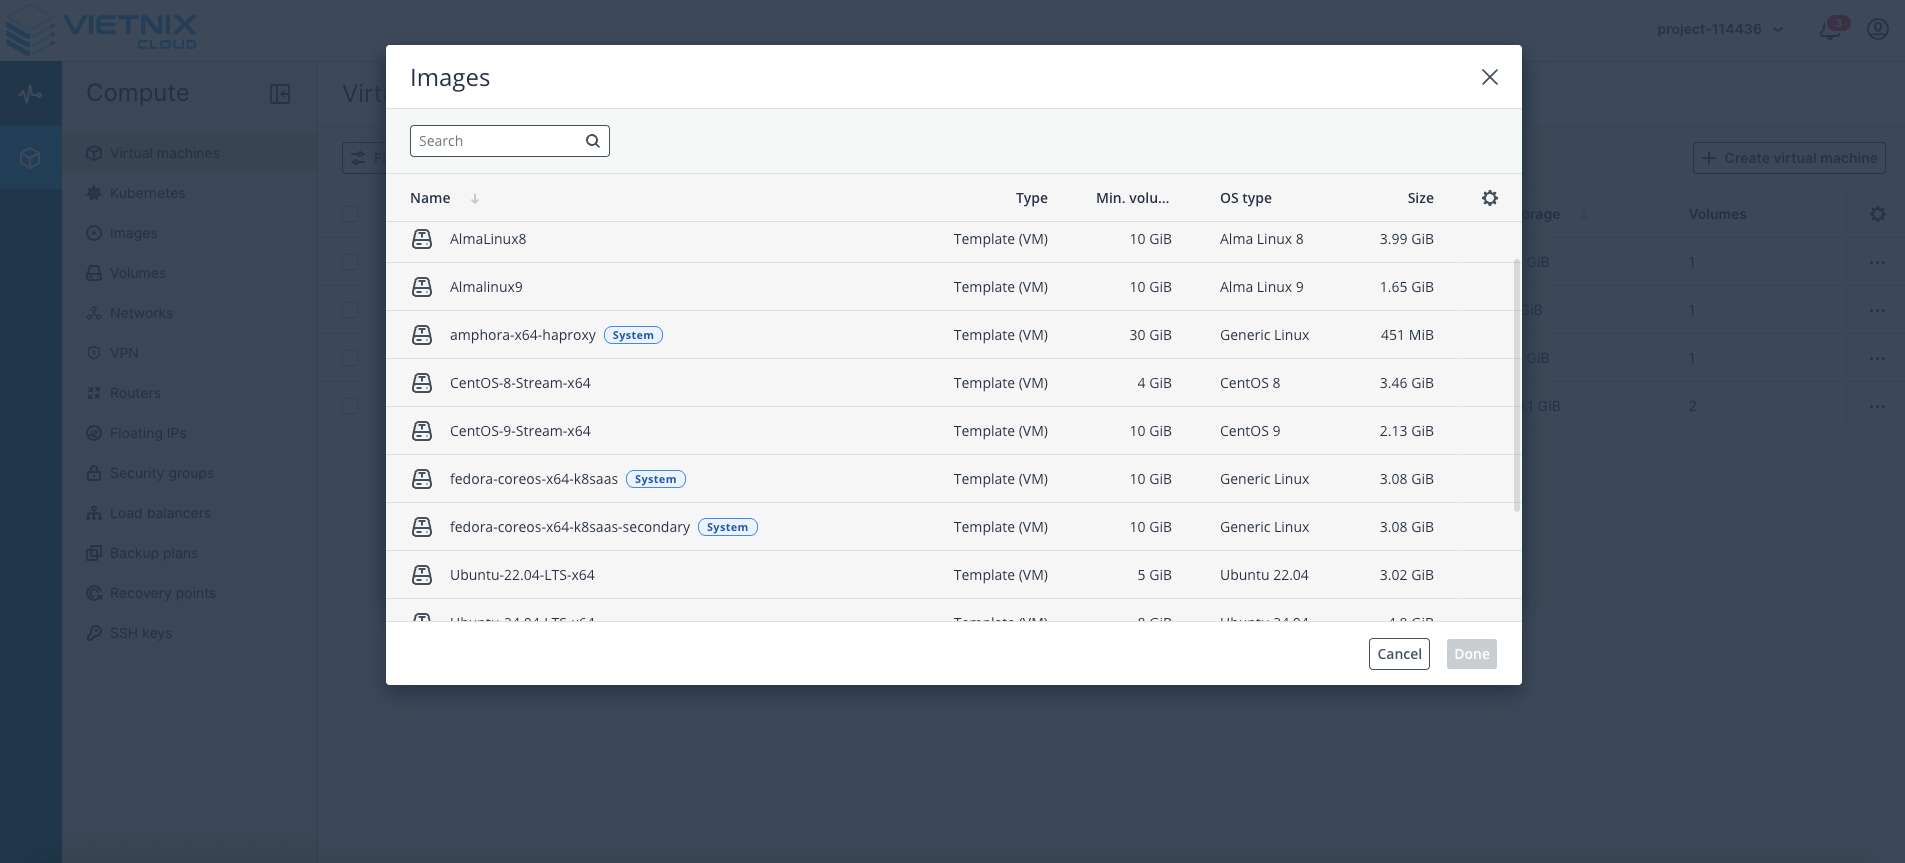
-
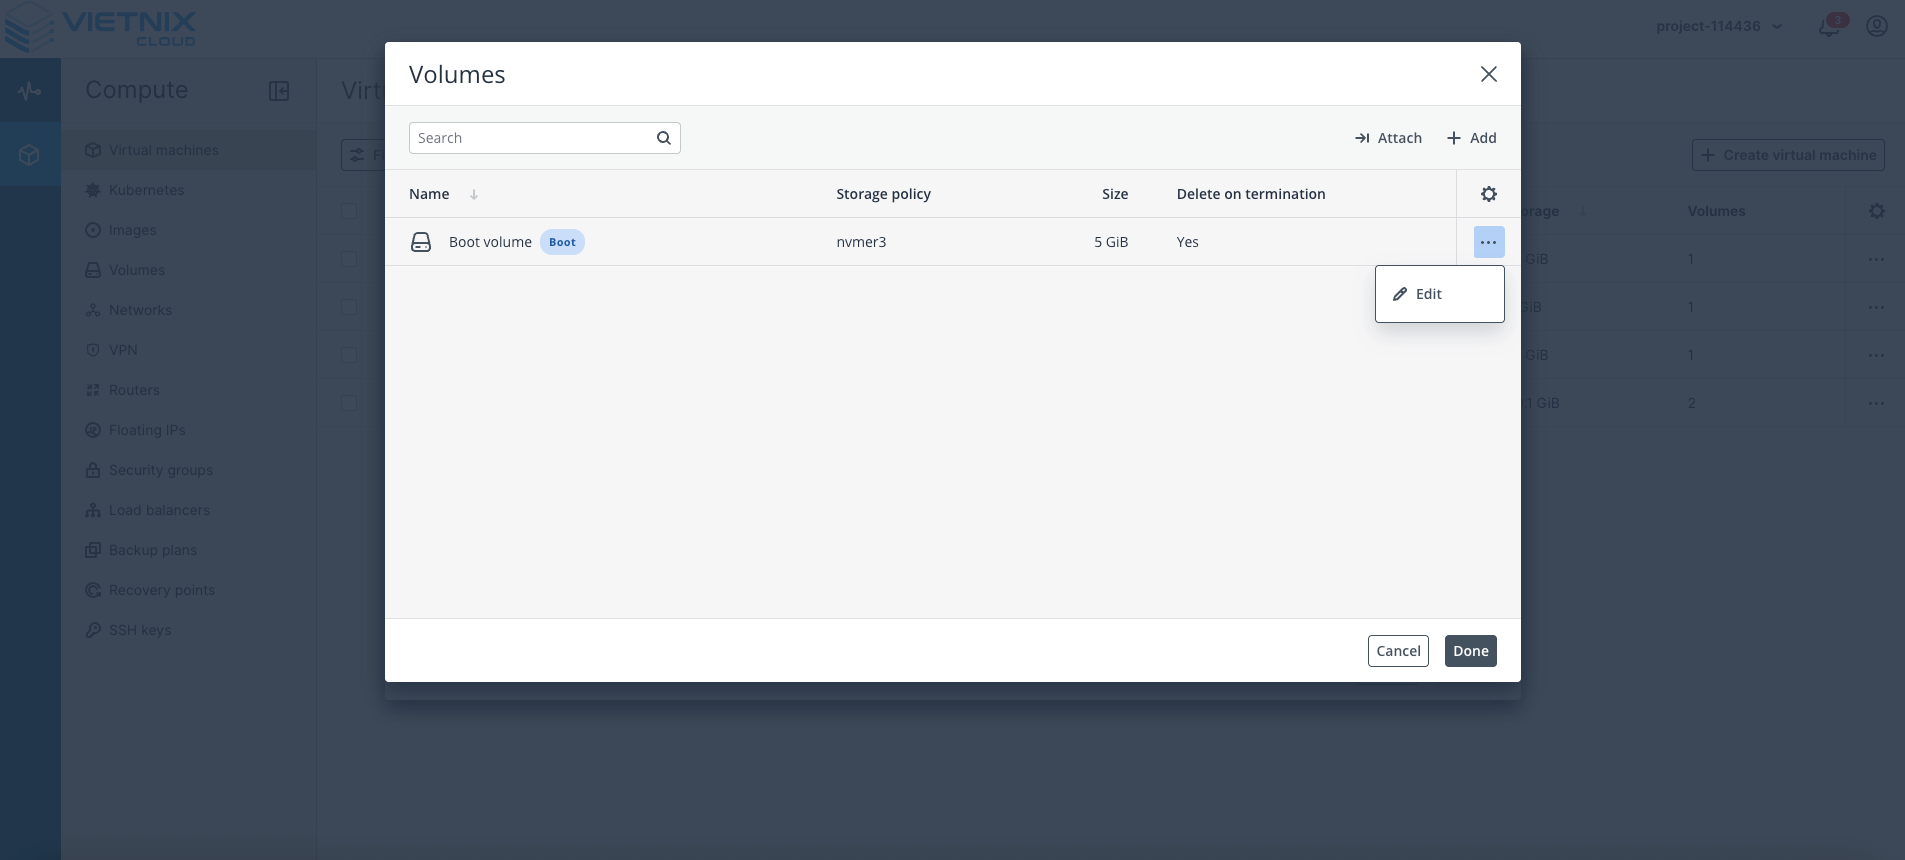
Volume (Optional): If deploying from an image, a boot volume will be created. You can edit the size (e.g., increase to 10 GB).
-
Flavor: Select the resource configuration for the VM (e.g.,
medium). Adjust based on your needs.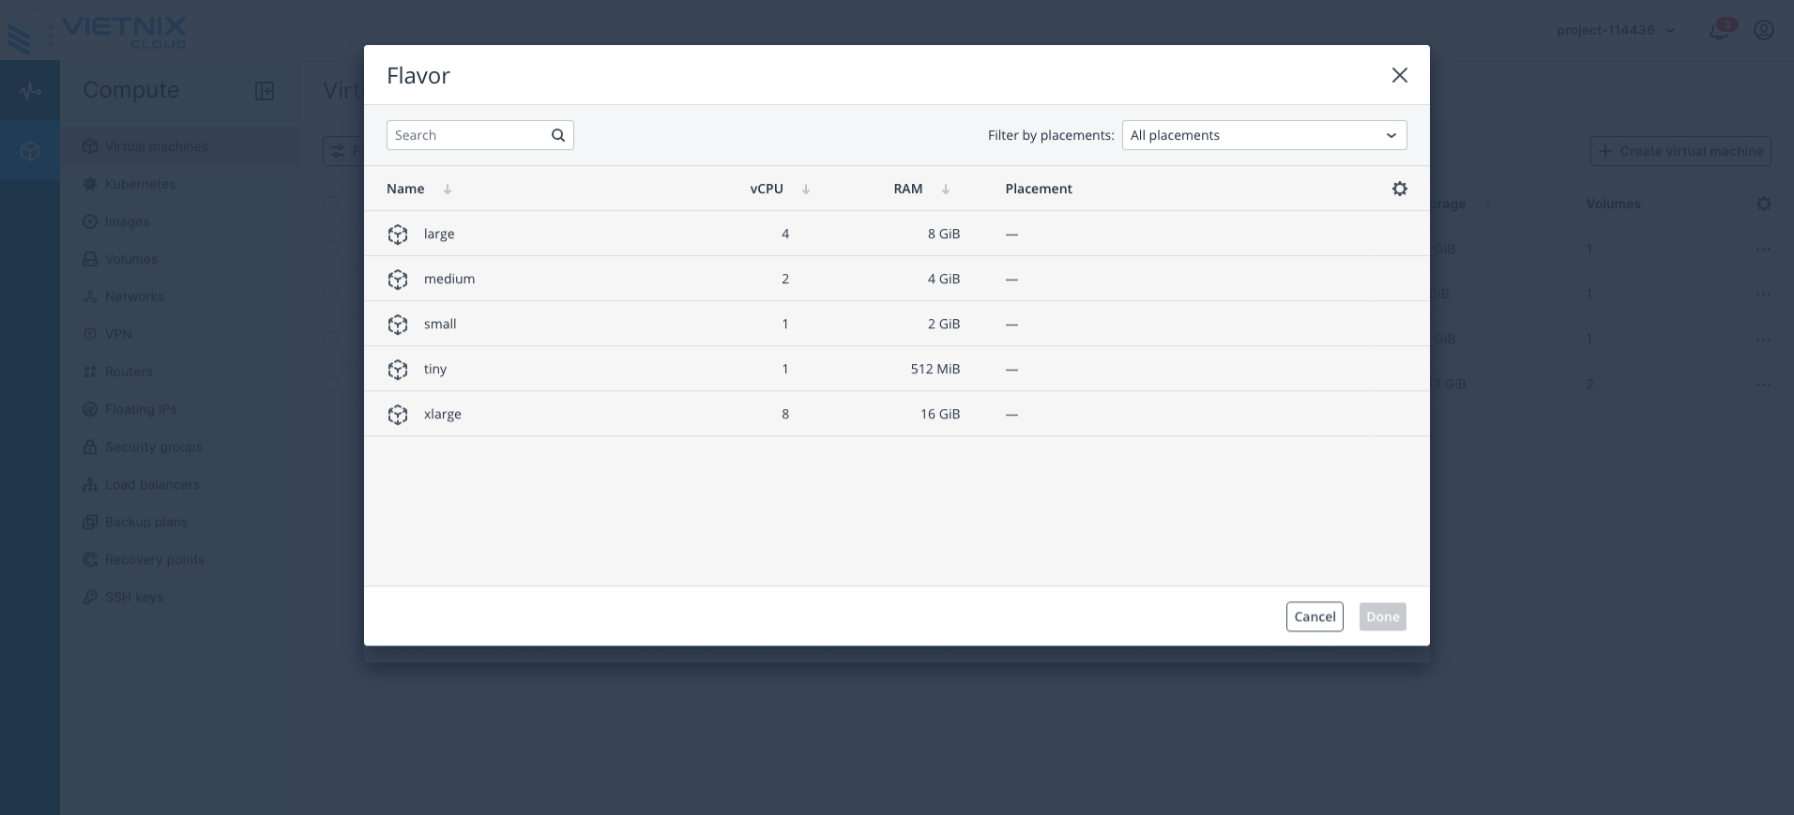
-
Network: Choose the virtual network created earlier.
Click Add, select the network, and leave other values as default. Click Add → Done.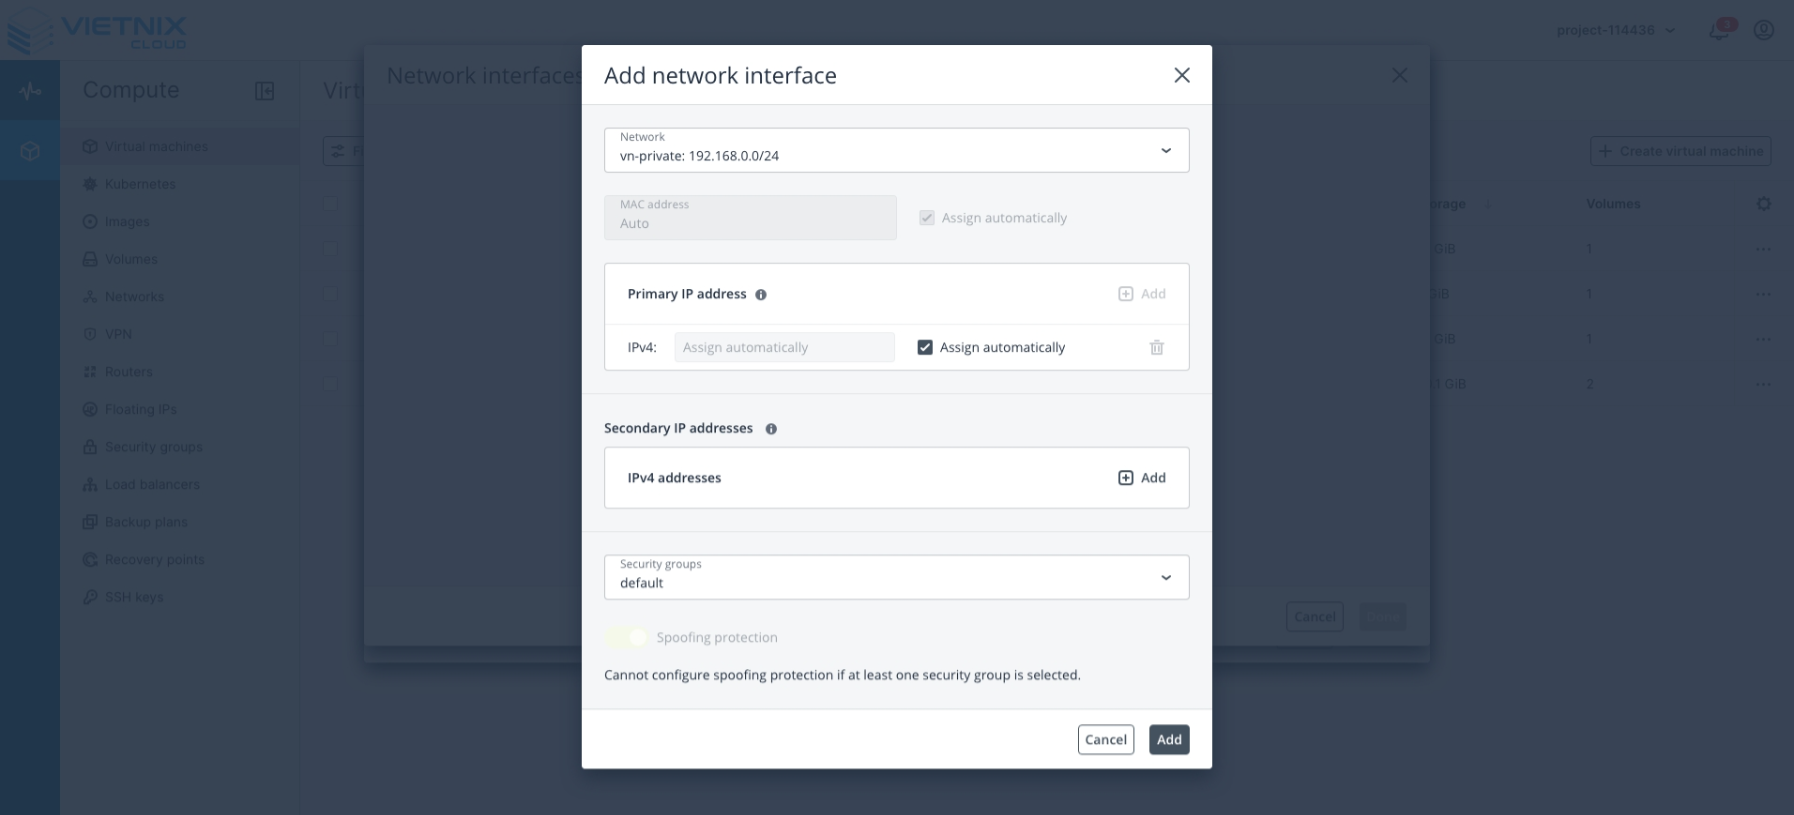
-
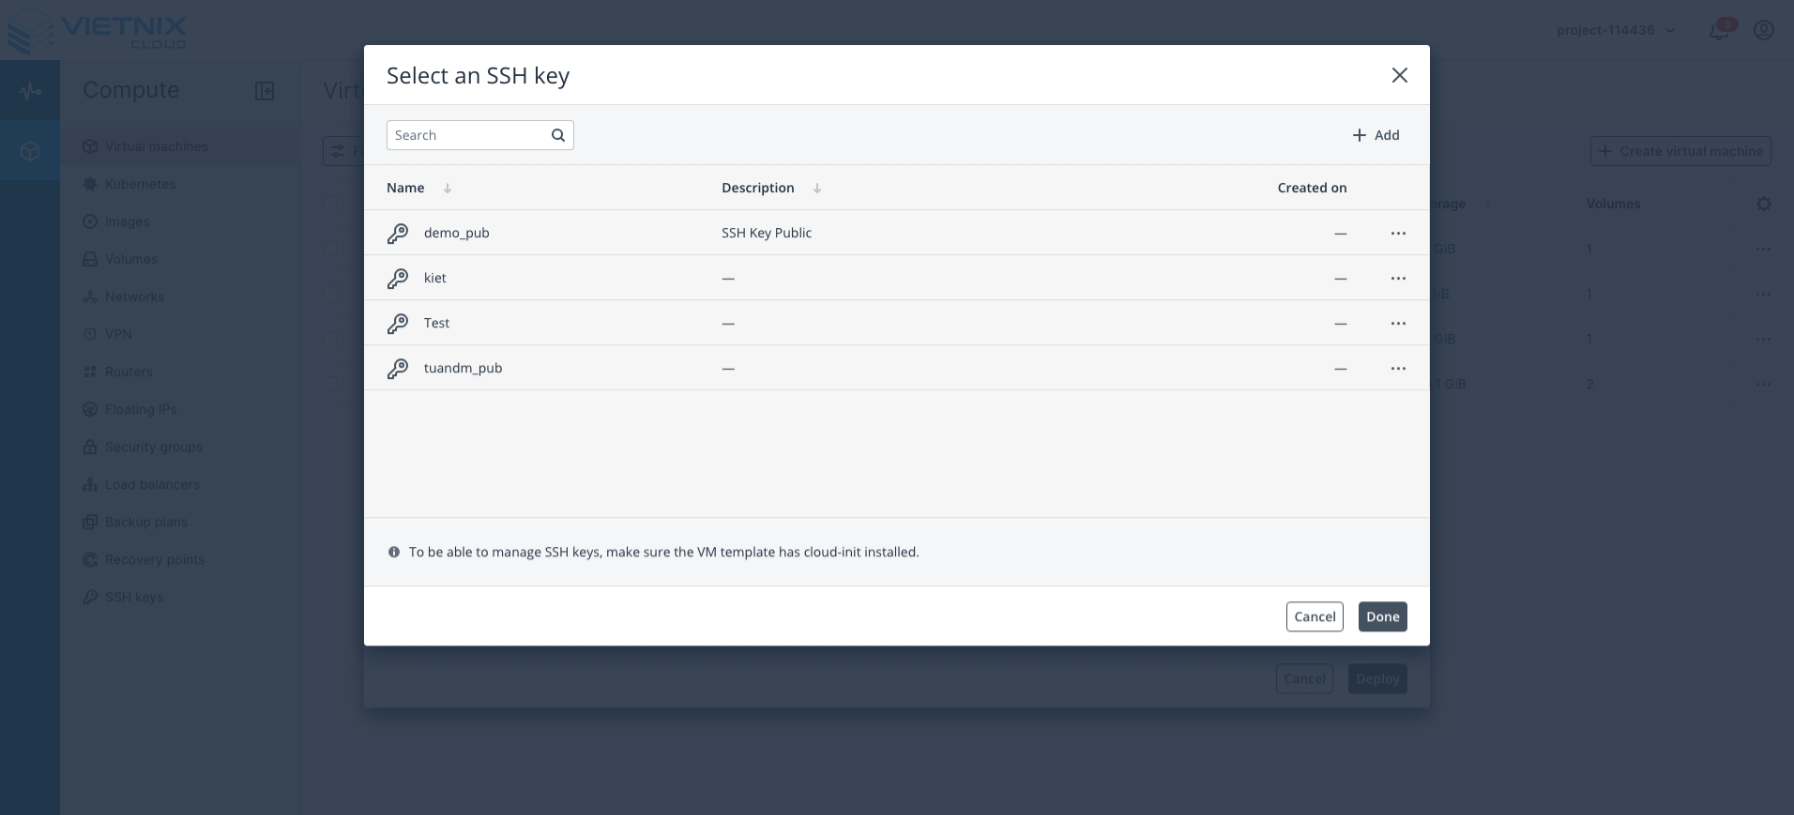
SSH Key: Select the SSH key for this VM. This step is required for SSH access.
-
-
Summary: Review the configuration, then click Create Virtual Machine.
-
Click Deploy to start creating the virtual machine.
-
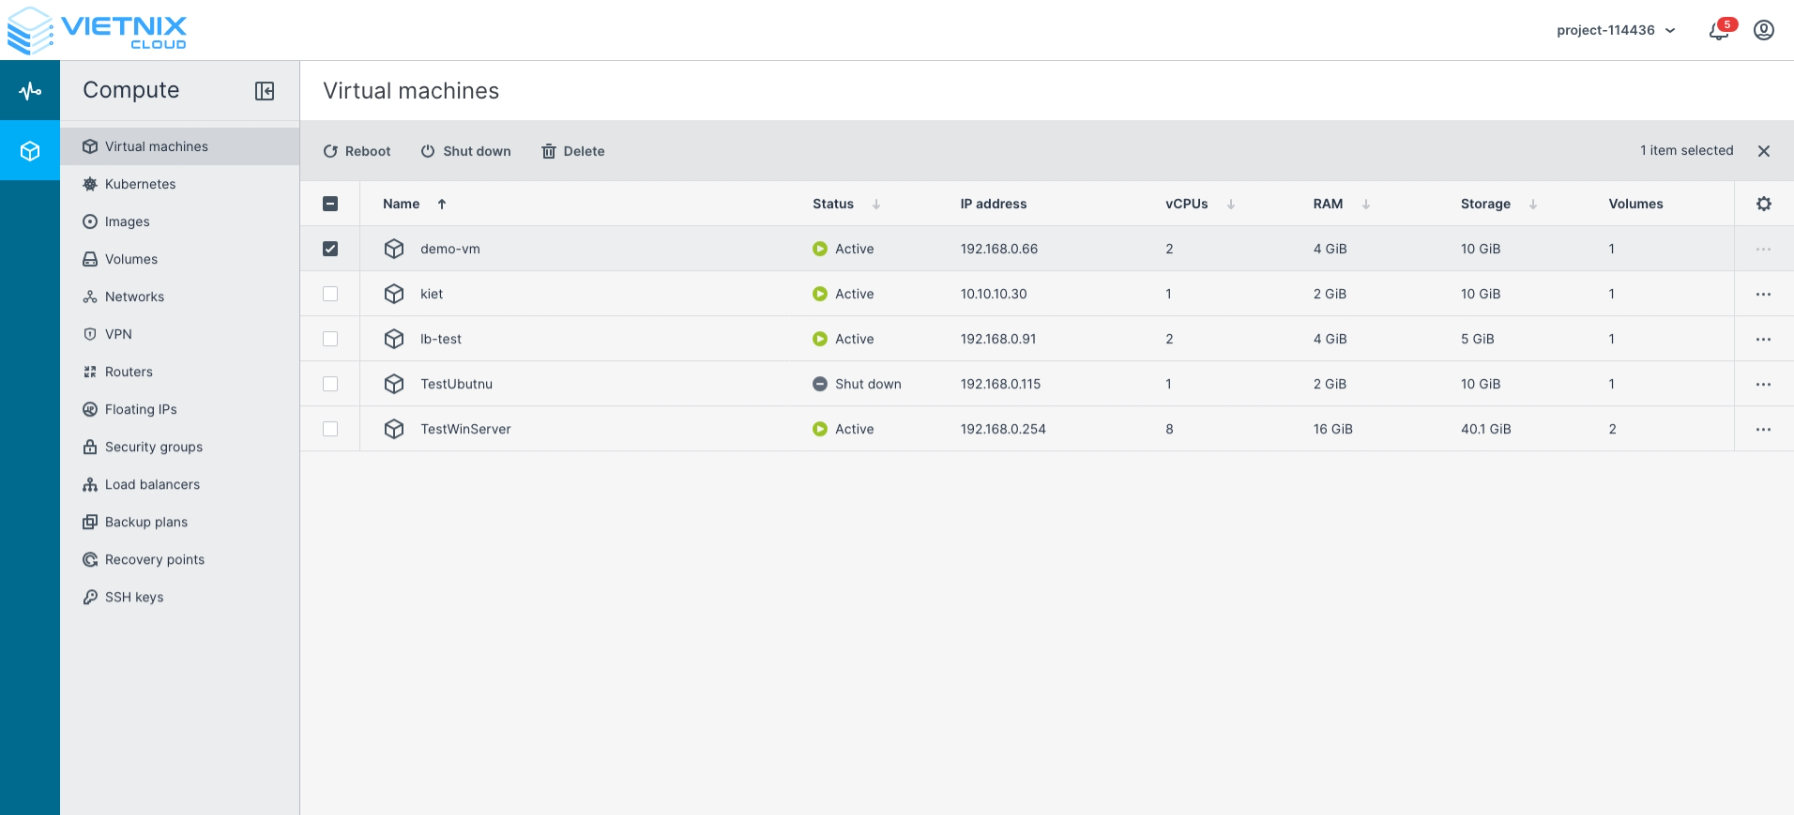
Monitor the progress of the VM creation.
-
Once the VM status changes to Active, your virtual machine is successfully created and ready to use.
Connect to Virtual Machines
-
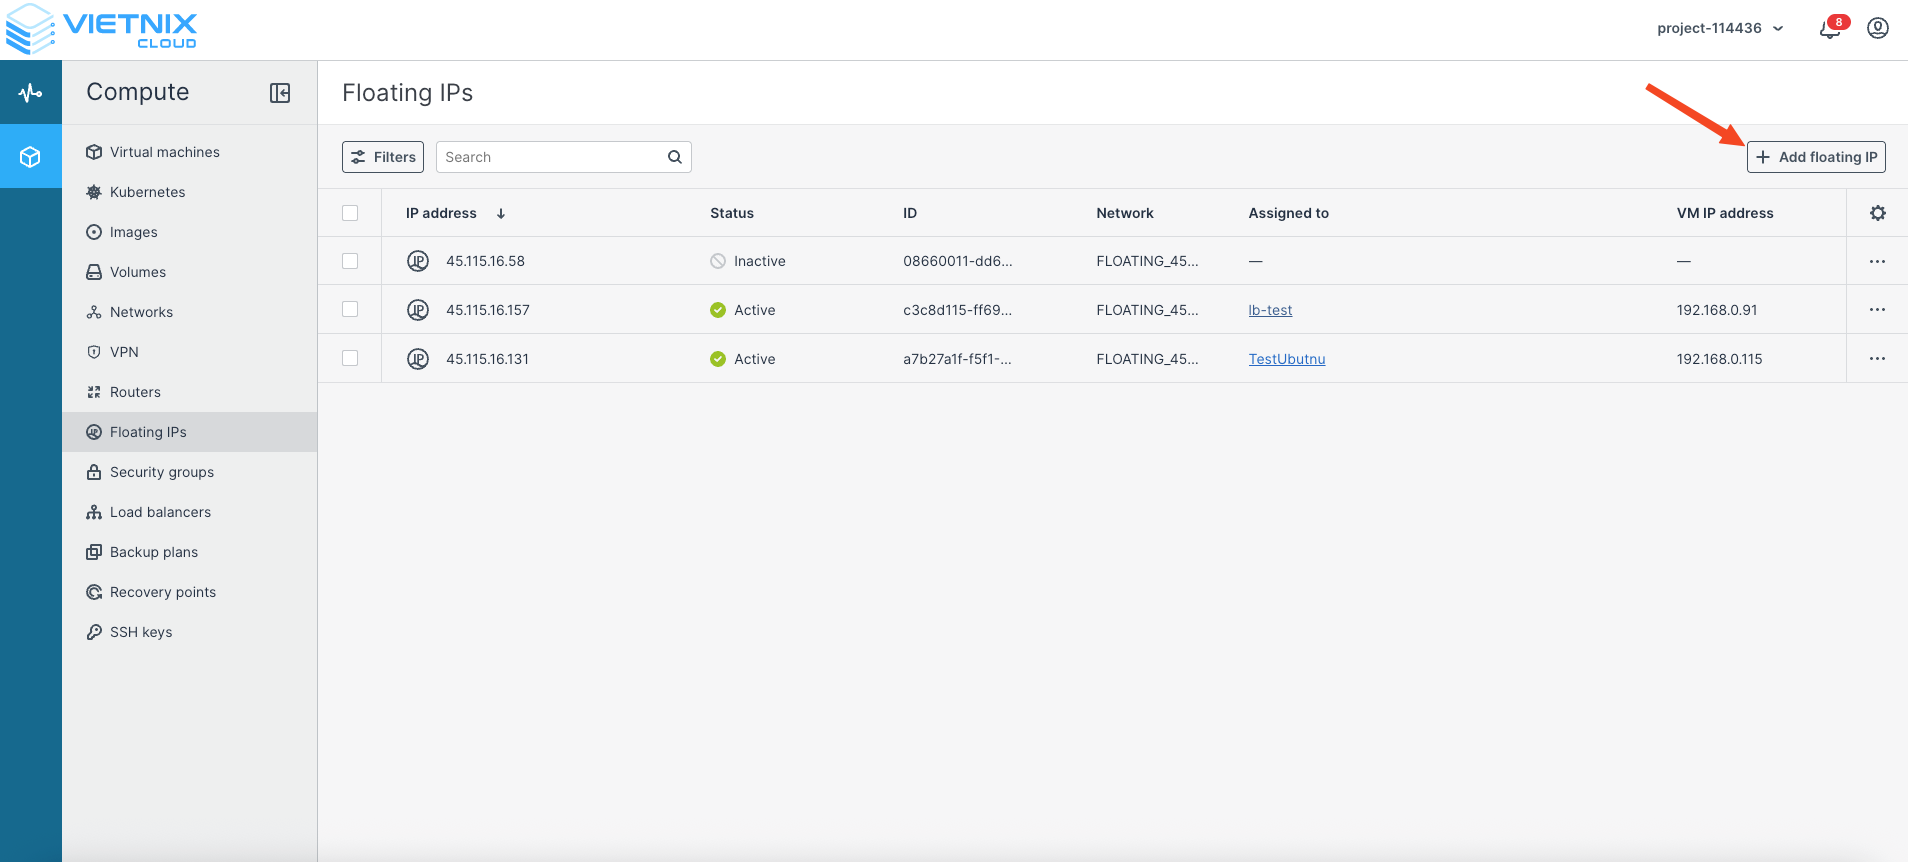
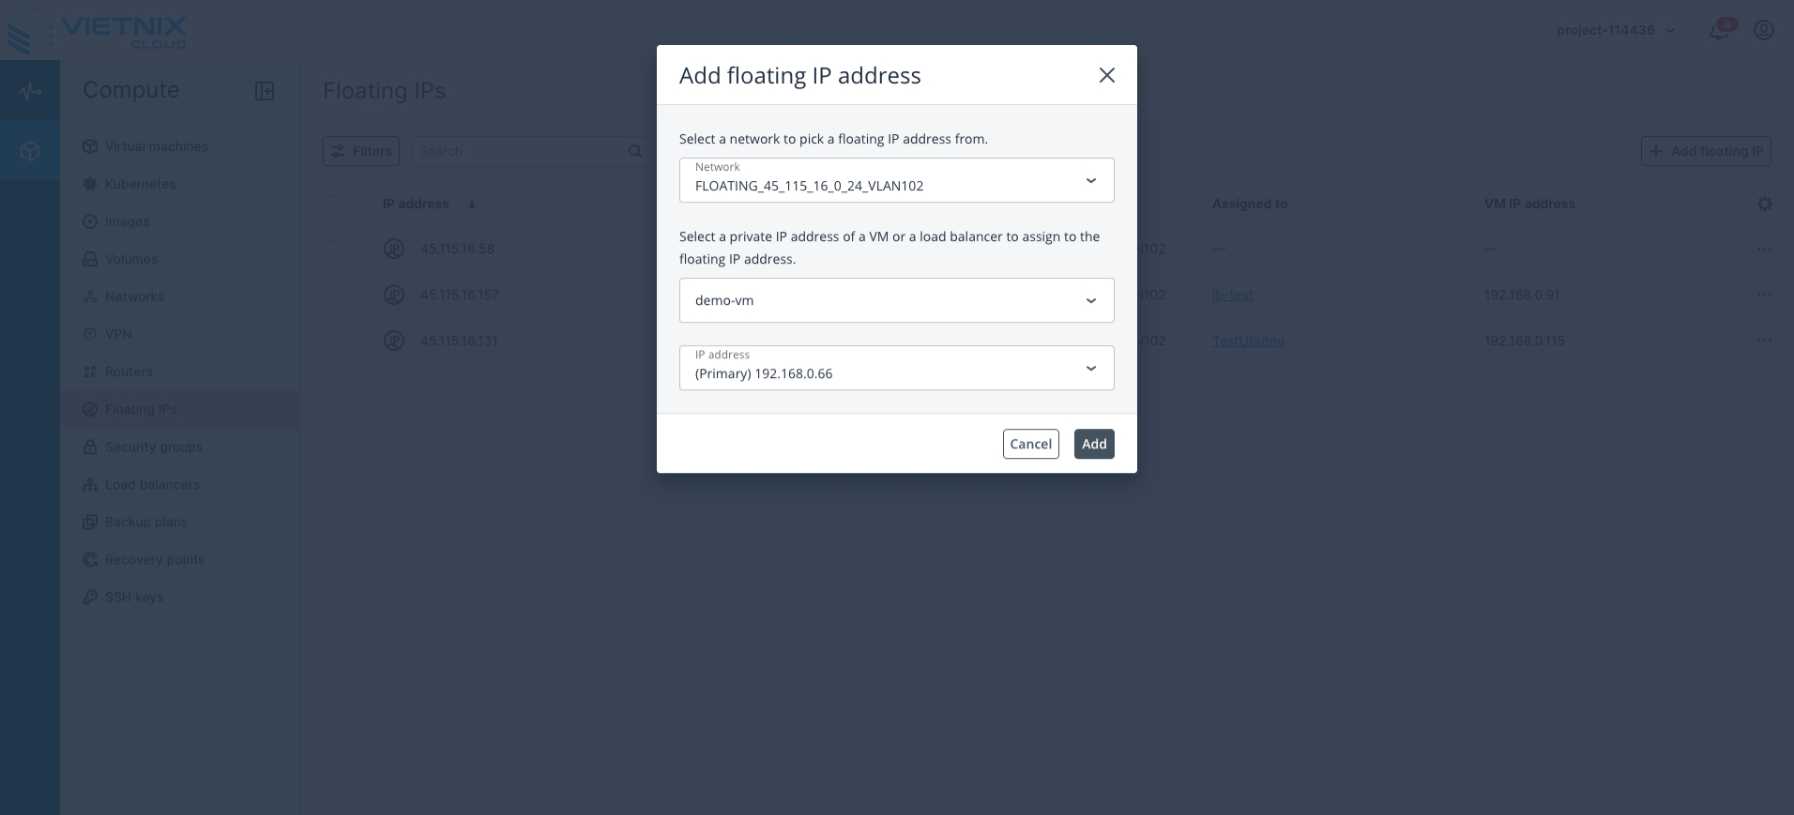
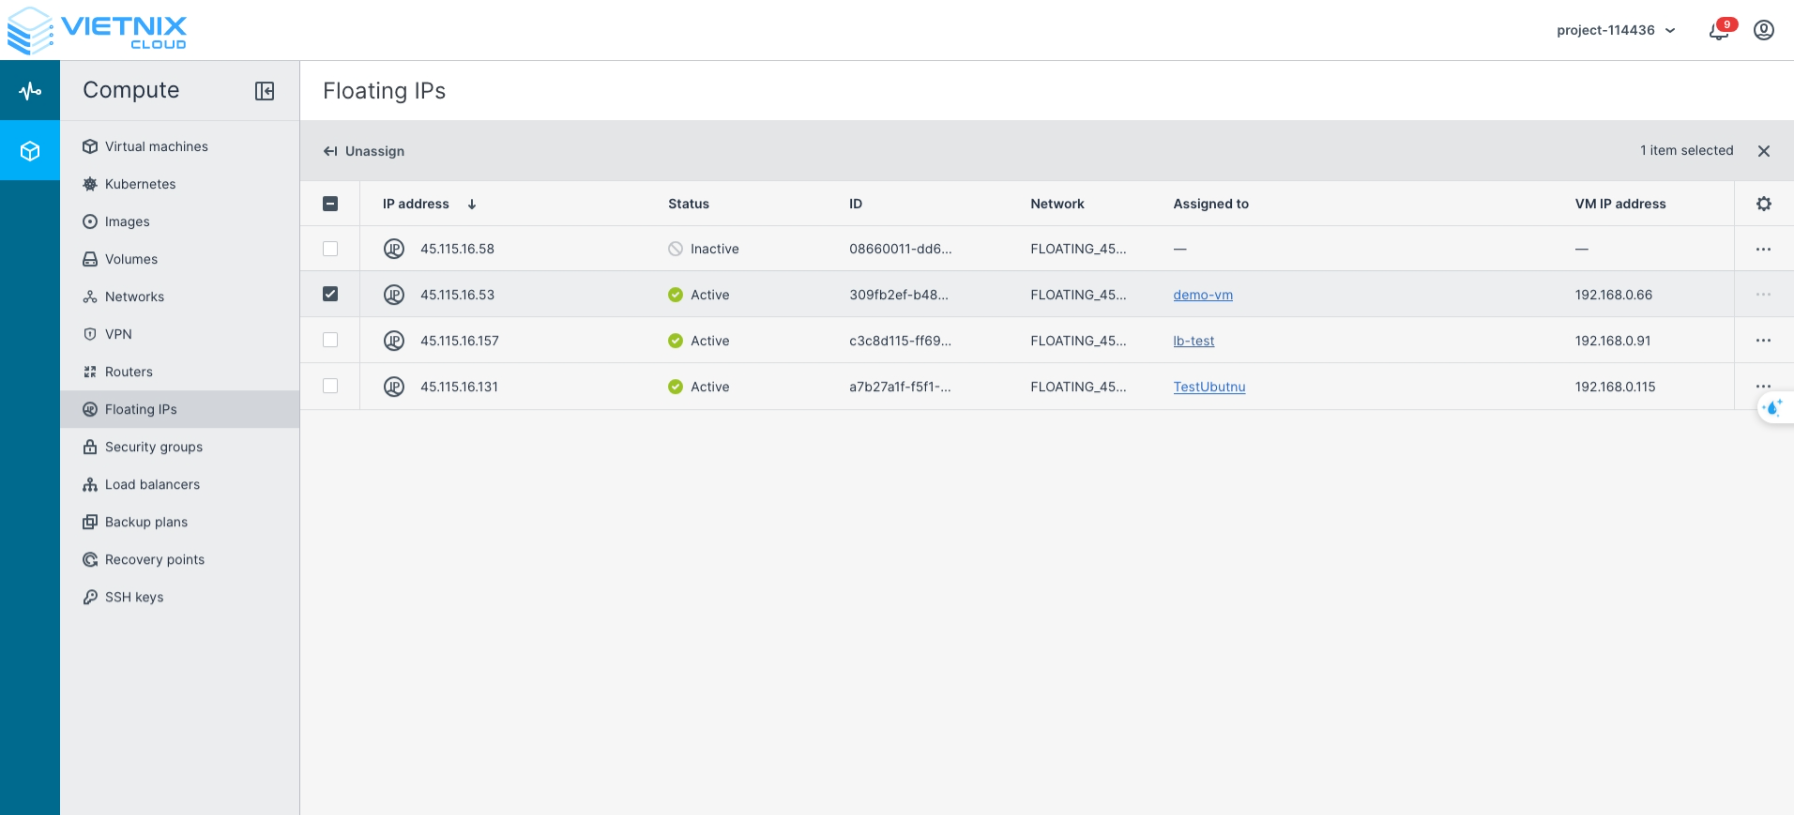
Navigate to Compute → Floating IPs.
-
Click Add Floating IP.
-
Configure the Floating IP settings:
- Network: Select the external network that will provide public access.
- VM or Load Balancer: Choose the virtual machine you created and want to connect to.
- IP Address: Select or assign an available IPv4 address for the VM.
-
Once created, the status will change to Active, confirming the Floating IP has been successfully assigned. You can now use this IP address to connect to your VM.
-
Copy the assigned Floating IP address from the Floating IPs list.
-
Use the following command to connect to the virtual machine via SSH:
The default user is cloud-user.
ssh cloud-user@<Floating-IP> -i ~/.ssh/id_rsa
Debug Virtual Machine via Console (Optional)
You can directly monitor and debug a virtual machine using the Console interface in the Vietnix Cloud Dashboard.
Steps to Access Console
-
In the Virtual Machines section, select the VM you want to debug and click Set Password.
This password will be used for the root user when logging in via the Console.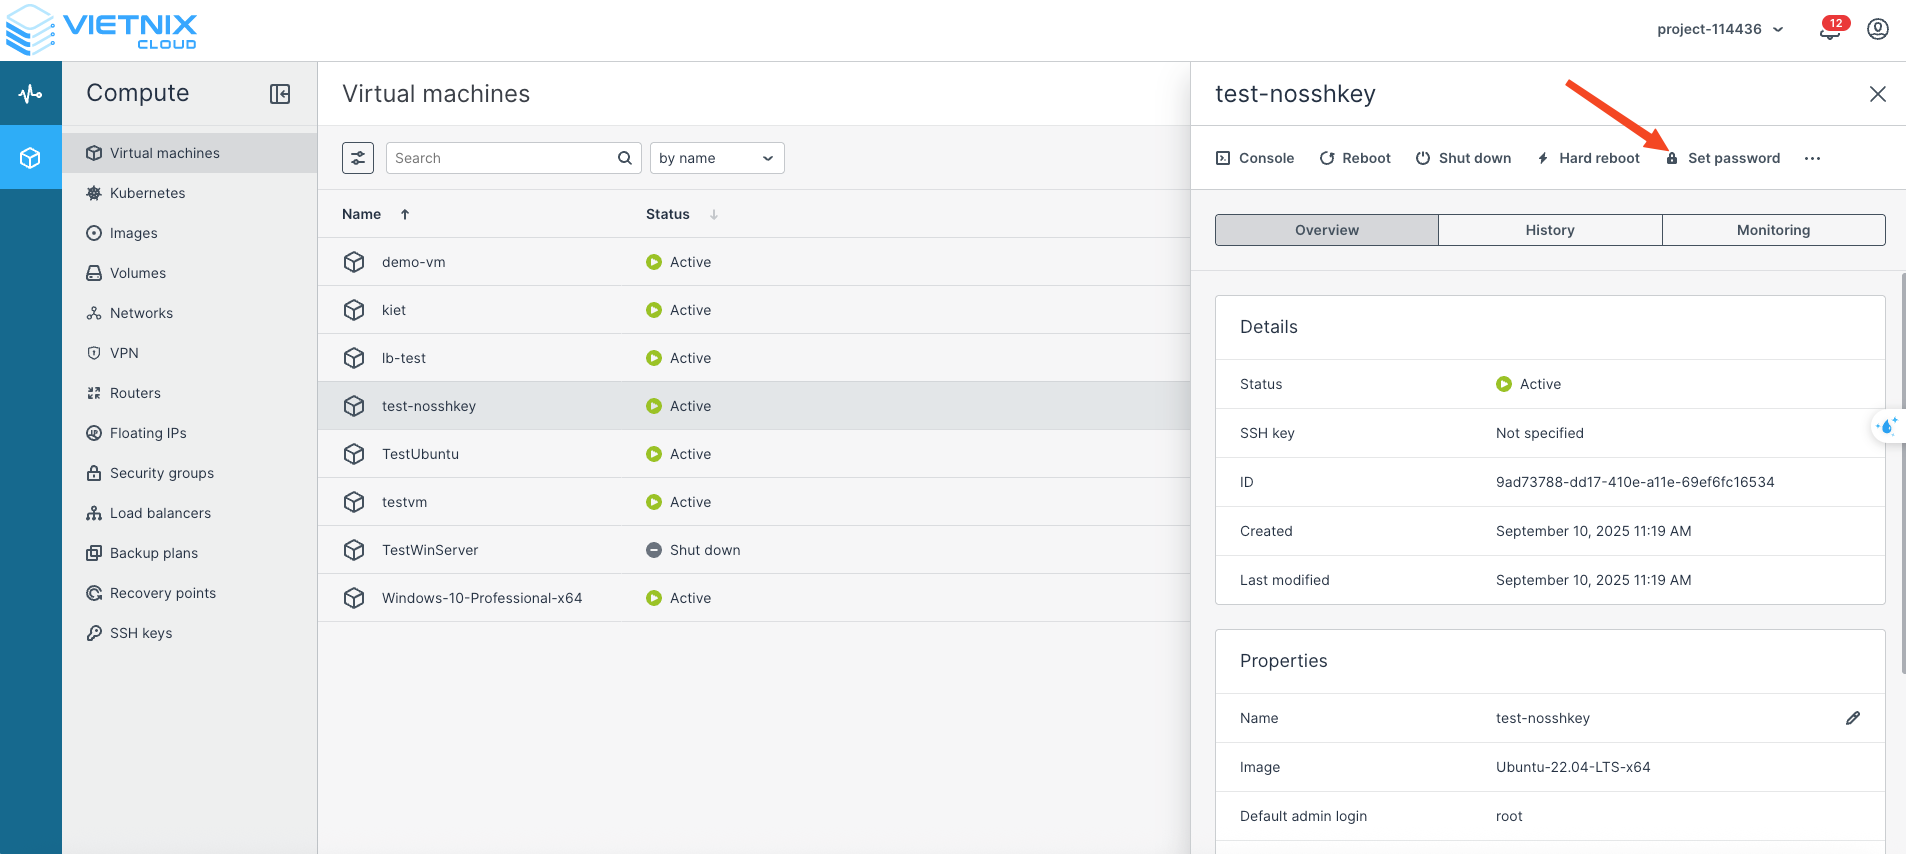
-
You can either set a custom password (following the password policy) or click Generate to automatically create one.
- Click the eye icon next to the password field to view it.
- Save the password in a secure location.
- Click Set to apply the password.

-
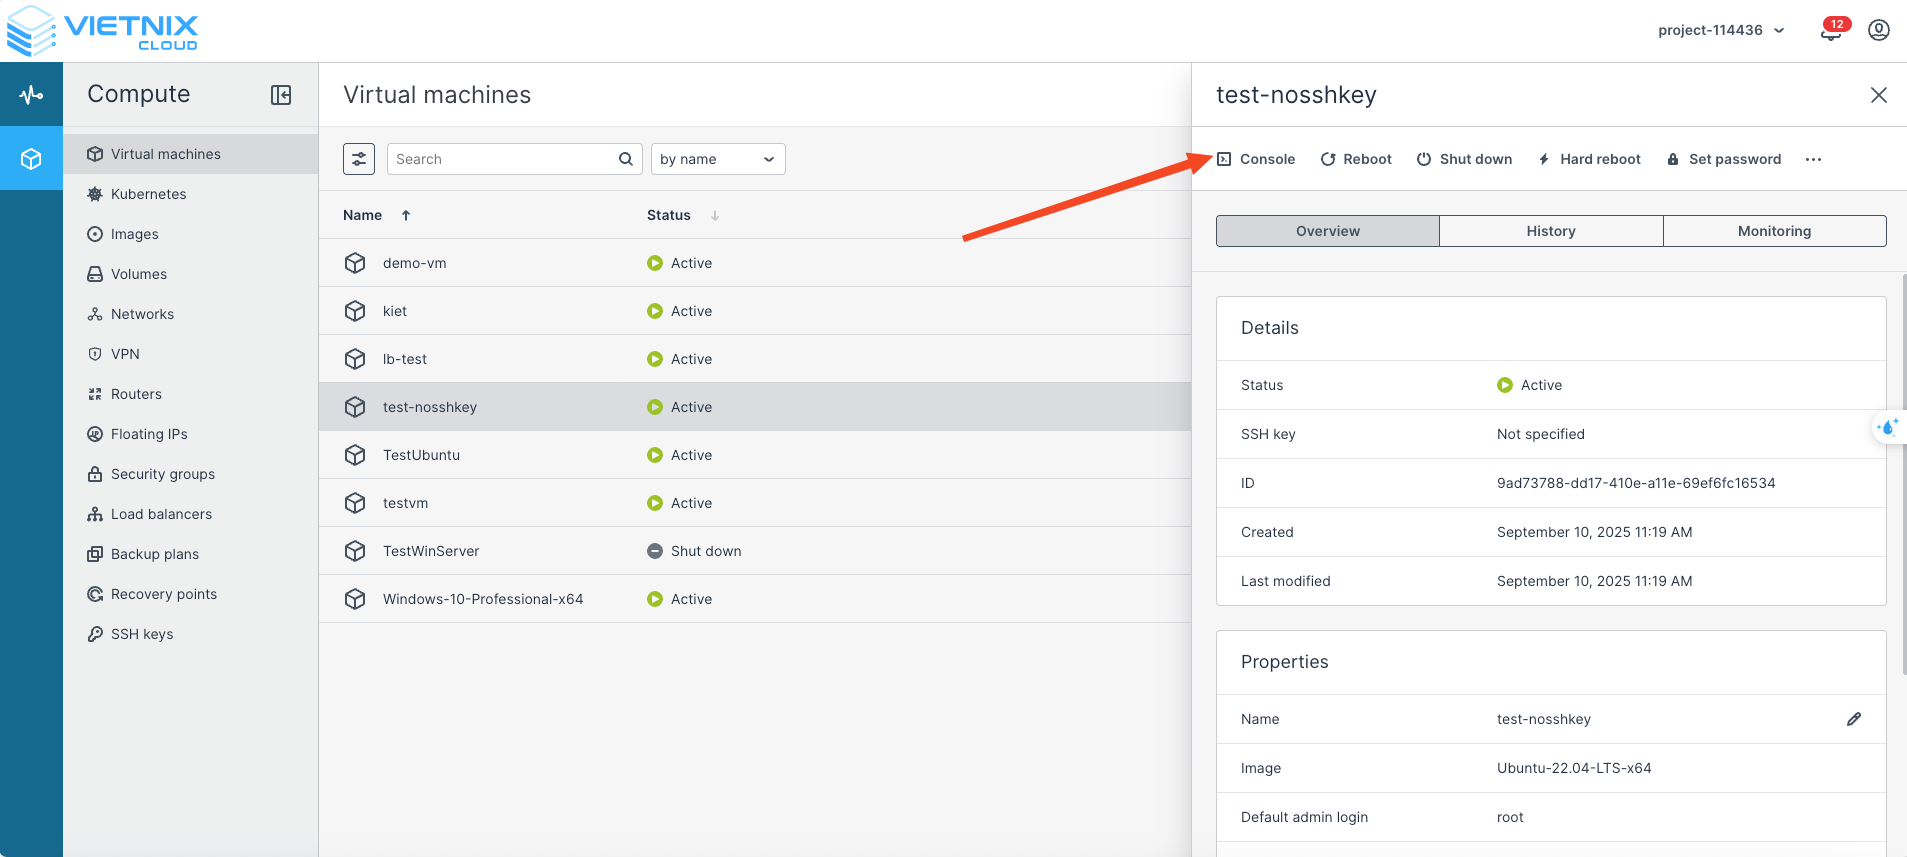
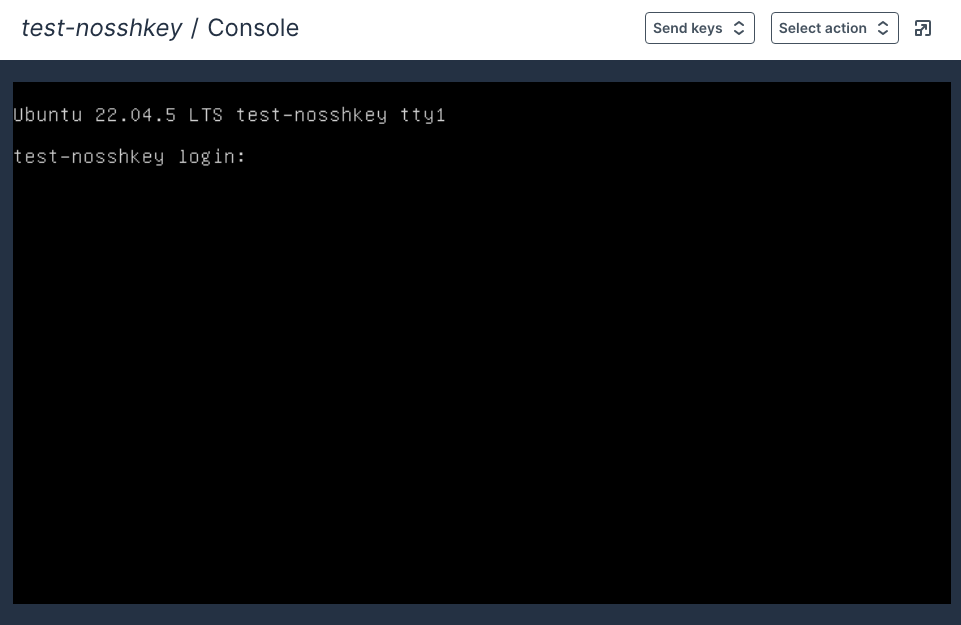
In the Virtual Machines section, select the VM again and click Console.
-
Enter the password you set earlier to log in as the root user and start debugging directly from the Console.
Note
- This method is only intended for debugging purposes.
- To access the VM via SSH, you must still configure and attach an SSH key as explained above.
You have now successfully created and connected to a virtual machine. The next guide will walk you through creating a Kubernetes cluster on Vietnix Cloud. Good luck!